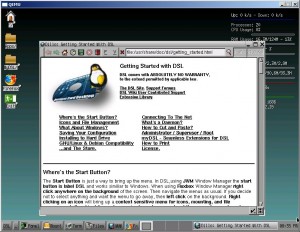
This tutorial describes how to get DSL (Damn Small Linux) to boot from the boot partition of a working bootable USB flash drive currently using SYSLINUX as the boot loader.
Although many related guides on the web describe how to create multi-boot USB drives, many are lacking when it comes to DSL because: (1) a different boot loader such as GRUB is used (2) the instructions are for creating dedicated boot USBs using a single app or Linux distro, or (3) not enough details specific to DSL are provided.
Rather than create a comprehensive how-to for multi-boot flash drives, this guide limits itself to this particular distro, since other guides, including Create a Mulitboot Multipartion USB with Syslinux and Grub4Dos, provide instructions for successfully creating multi-boot USBs using other Linux distros and applications.
This tutorial applies if the following conditions are met:
1. You can successfully boot at least one other distro or application on the USB drive with SYSLINUX (Ver 3.81 was used for this guide)
2. You want to add DSL to create a multi-boot USB drive or you are unable to boot DSL on a USB drive with at least one other distro or application that currently boots with SYSLINUX
OK. Now for the instructions:
Download the Embedded Distribution of DSL:
Why use the embedded version? It’s provided in a zip file, so there is no need to extract and manipulate files from an ISO. The embedded version also comes with QEMU, which allows DSL to run within Windows and in Linux. So even if you can’t boot DSL from SYSLINUX, you can check the integrity of the DSL installation using QEMU by clicking dsl-base.bat in the DSL folder (see next step). The downside of running DSL with QEMU is that it will be extremely slow, about 5-6 times slower, than when it’s running natively. The DSL embedded version used for this guide was version 4.4.10. You can get the embedded version of DSL from here. The direct download link for the embedded version of DSL used for this guide is dsl-4.4.10-embedded.zip.
Create a Folder for DSL Embedded in the Root of the USB Drive’s Boot Partition and Unzip DSL Embedded to that Folder:
Pick any name you like. In my case, I made a folder named “DSLEmbedded” on my USB’s root. The reason for a separate folder is to avoid conflicting files that may already exist on the root for other distros or applications such as syslinux.cfg, knoppix folders, boot.msg, readme.txt and others. In fact, it’s preferable to put every distro in its own folder when you can, but that’s not always possible without complex folder organization schemes and/or file coding mods. Because of this, some distros should be in the root by themselves or installed to their own partition since they often use complex boot menus, they’re coded to work from root, and/or they have multiple files and folders (making upgrading and troubleshooting more complex when everything is installed to a single partition). However, DSL in a separate folder can coexist with many other distros using SYSLINUX as the boot-loader – you just need to edit the root’s syslinux.cfg file and experiment to see what can coexist with the least amount of work and conflict. Currently, I have DSL co-existing in the same partition with SuperGrubDisk, two versions of Puppy Linux, and several Windows apps in ISO format, all booting from the same syslinux menu and almost all of them in separate folders.
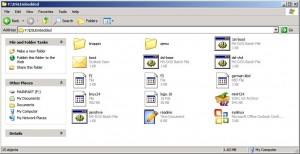
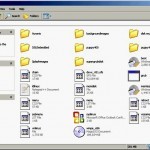
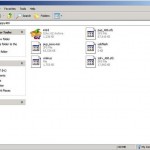
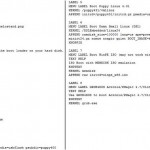
Below are some thumbnail screen-shots showing the organization of the main partition, the Puppy400 folder, and the syslinux.cfg file. As with all of the screen-shots in this guide, click to enlarge them. Although outside of the scope of this guide, you can see Grub4Dos (grub.exe and menu.lst) are used to boot ISOs and other apps in multiple partitions which also have SYSLINUX installed in the boot sector.
For a more detailed view of the syslinux.cfg file, either click the link in this sentence to open in your browser or right click the link to save it.
Edit the Current syslinux.cfg in the Root drive to Create a Menu Entry for DSL and Save It:
This guide assumes a syslinux.cfg file already exits in the root and is used to boot at least one other distro or application.
Important: Pay particular attention to use of “/”, spaces, and capitalization in file paths! Below is a copy of my entry:
LABEL 6
MENU LABEL Boot Damn Small Linux (DSL)
KERNEL /DSLEmbedded/linux24
APPEND ramdisk_size=100000 lang=us apm=power-off vga=normal initrd=/DSLEmbedded/minirt24.gz nomce noapic quiet BOOT_IMAGE=knoppix knoppix_dir=/DSLEmbedded/KNOPPIX
Note: (1) Unless you used the same name, use the name of your folder in place of “DSLEmbedded” everywhere in the menu label above. (2) Depending on your needs and/or your system, you may want to change the DSL cheat codes in the APPEND line. See the DSL Cheat Codes Wiki for more information.
That’s all there is to it. Reboot your PC or laptop and you should now be able to boot DSL from the SYSLINUX boot menu!
_________________________________________________________________________________
If Nothing is Working:
If DSL still doesn’t boot, on another bootable USB drive (with SYSLINUX as the boot-loader), try installing Embedded DSL by itself to the root and not in a separate folder (move everything out of the folder and place it in root). In other words, and this is important – what was in the default folder (e.g., dsl-4.4.10-embedded or DSLEmbedded) should now be in the root of the partition. DSL should now boot with the default syslinux.cfg file. If that works, you are getting close; it’s just a matter of getting the file paths correct for the DSL folder you are going to use. Next, place DSL in a folder and move the syslinux.cfg file to root and then edit it using the instructions above to get it to boot. If successful, you can then duplicate those changes to the syslinux.cfg on the other USB drive. Also, you could just use the 2nd USB drive and add other apps and distros to it. Add one app or distro at a time then test to see if both boot, then add another distro and test again.
Because there are unlimited combination’s of distros and apps possible, differences in hardware, many multi-booting techniques and other factors, there is no way around some experimentation/trial and error testing to determine what works and what doesn’t.
If you are having trouble making a working multi-boot USB with SYSLINUX or just want to learn how, below are links to get started. If you still can’t get DSL to boot after that, then come back and recheck the suggestions again. Usually, most problems are minor such as using incorrect file paths or file names in the syslinux.cfg file.
Good luck and have fun.
Additional help is available at the following:
Guide for Multi-booting from a USB Drive
Damn Small Linux Wiki: Install to USB from Windows (Method II)
Comments welcome.


Spelling error report
The following text will be sent to our editors: