Last updated on 01/19/2020

A handy reference source that provides FFMPEG command-line examples with breakdown as well as general information about video formats.
BugCodeMaster


Technical Tips for Everyday Computing
A handy reference source that provides FFMPEG command-line examples with breakdown as well as general information about video formats.
This guide demonstrates how to automate concatenating two or more audio files of the same format using FFmpeg while preserving the metadata in the merged file. A tested example batch file is provided to help illustrate. This guide is related to a previous post for concatenating audio files also with a batch file, but with using a different set of command-line tools for joining them.

FFmpeg is an open-source and cross-platform command-line set of SW programs for recording, converting and streaming audio and video. First developed under Linux, compiled versions are available for most operating systems and platforms. It has since become one of the best-known and most widely used products of its type. FFmpeg is compatible with a large number of SW applications and it’s used in many popular SW products such as VLC Media Player, YouTube, and Handbrake. Although FFmpeg includes over 100 codecs and a mind-boggling number of possible combined command-line options, it’s not that difficult to use.
To demonstrate how easy it can be, FFmpeg.org provides this example command for converting input.mp4 to output.avi on its homepage:
$ ffmpeg -i input.mp4 output.avi
While the above example is simple, FFmpeg commands can also be more complex.
The FFmpeg version used for this guide is a Windows complied version availiable from CODEX FFMPEG. Simply download the latest 32 or 64-bit static build from the builds page here and extract it to a folder (builds are compressed in 7z format). The version used was git-dee7440 (2015-11-01).
The FFmpeg package contains the following three main executable tools in the bin folder:
Note that there are a number of commands that are common between the three tools. Only ffmpeg.exe and ffmprobe.exe are used in this guide.
FFmpeg provides three levels of help files: basic, long, and full. To view the commands available in the help files, click the ff-prompt.bat file in the root directory to open a command window or open your own in the bin folder and type in one of the following commands:
ffmpeg -h -- print basic options
ffmpeg -h long -- print more options
ffmpeg -h full -- print all options (including all format and codec specific options, very long
Here are links to the basic help file: ffmpeg_help and the full help file: ffmpeg_help_full. When printed to text, the help file sizes are: 5kB for the basic, 25kB for the full, and 487kB for the long help files. The long help file contains about 7,000 lines, which provides a hint as to how many commands are available.
Batch file link: tasks_FFmpeg.bat
The link for the batch file used for this guide is provided above. Be sure to remove the txt extension before using it. The batch file is setup to work by the drag and drop method only.
To concatenate the audio files and write the metadata to the merged file, the batch file steps through the following:
For FFmpeg to use a listfile (confiles.txt), the filenames must be written to the confiles.txt file on separate lines using the following format.
file 'filename1.ext'
file 'filename2.ext'
The provided batch script should work for most audio formats of the same type provided they were encoded using the same codec (although they can be different containers). It was tested with opus, mp3, and aac files on a PC running Windows XP.
The batch script also provides options to separately print out audio file metadata, basic data, or stream and container (format) data to screen or to a file in json format (human readable form), with options to change the format in the script.
The main FFmpeg commands for extracting the metadata and concatenating the audio files are explained below. Although the ffprobe command was also used, it’s fairly simple to understand and should be self-explanatory by examining the code and the help files. The filenames used below are not actually in the batch script but have been simplified for explaination purposes.
The below command extracts and writes the metadata to a text file:
ffmpeg -i infile.ext -f ffmetadata metadatafile1.txt
The metadata1.txt file is formatted as below:
;FFMETADATA1
album=Name of Album
artist=Artist Name
genre=Music Genre Name
title=Title Name
track=Track #
date=Date
encoder=Encoder Used
The next command is used to process mp3 files only. It concatenates the mp3 files and writes the metadatafile1.txt contents in id3 format of the first mp3 file to the merged mp3 file:
ffmpeg -f concat -i confiles.txt -i metadatafile1.txt -map_metadata 1 -id3v2_version 3 -write_id3v1 1 -c copy filename1_merged.mp3
The next command listed processes audio files other than mp3. It functions the same as the previous command but writes standard metadata (if present) from the first audio file to the merged file:
ffmpeg -f concat -i confiles.txt -i metadatafile1.txt -map_metadata 1 -c copy filename1_merged.ext
There are a number of online FFmpeg command-line generators that can help construct various audio and video FFmpeg commands. A few of them are listed below:
YouTube playlists are a useful way to watch videos in sequence or for sharing a list of videos with others. However, at times it may be insecure to share playlists created from your personal account or inconvenient to log in into your account to create them. This guide describes how to create playlists in a single link that allows you to view your videos immediately, save them for later, or to share them with others – without logging into your YouTube account.
 A YouTube playlist can be created manually by concatenating the unique videoIDs, separated by commas, to the URL:
https://www.youtube.com/watch_videos?video_ids=
A completed playlist will thus look like so:
https://www.youtube.com/watch_videos?video_ids=video_id#1,video_id#2,etc
Just paste the completed link into your browser to start the playlist. A more complete explanation of this process can be found at this blog post: How to Create YouTube Playlists without Logging In.
Creating playlists manually can be inconvenient, so a way to accomplish this automatically with a script was sought. Because the Windows command-line doesn’t easily support the clipboard without 3rd part tools, AutoHotKey was used instead since it can manipulate the clipboard more easily. AutoHotKey version 1.1.32.00 was used for the script and tested on a system running WinXP.
AutoHotKey script: youtube_playlist2.ahk
To use the script, run it to monitor the clipboard for youtube.com/watch, youtube.com/embed/, or youtu.be; text which is used in normal, embedded, or shortened YouTube video links. The script generally ignores any other text, so in most cases, the script can be active and not interfere with normal clipboard activity.
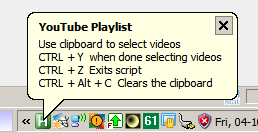
After starting the script, a popup message appears in the system tray to alert the user that the script has started and informs the user that CNTL +Y will create the playlist link and copy it to the clipboard, CNTL + Z exits the script, and that CNTL + ALT + C clears the playlist and clipboard.
Each time a YouTube video link is copied to the clipboard, a Tray tip displays the link that was processed and how many video links in total were copied and processed. Hit OK to continue. Wait 2.5 seconds between selecting videos (when the Tray tip disappears) before selecting another video.
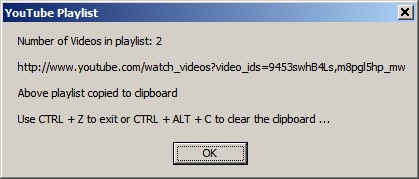
After selecting all your videos, use CNTL + Y to copy the final playlist to the clipboard. Another popup message (screenshot below) will appear. This popup indicates the total number of videos in the playlist, the final playlist link, how to exit the script, and reminds the user that the playlist link has been copied to the clipboard. The playlist link is ready to use by pasting it into a browser or in an email. After hitting OK you can continue adding videos or use CNTL + Z to exit, or CNTL + ALT + C to clear the playlist and clipboard. Other ways to clear everything and start over are to reload the script by right-clicking the script icon in the system tray and selecting “Reload This Script”, or just exit the script and restart.
The script can be further customized by the user as desired.
Although it requires a bit more technical effort than GUI-based applications, merging mp3 files with the command-line allows for a faster and more complete merging process and more flexibility and customization options. This guide demonstrates how to use a batch file and free Windows command-line tools to concatenate two or more mp3 files, preserve the ID3 metadata, and repair and verify the integrity of the combined file. The information in this guide was tested on system running XP SP3 32-bit and should be similar for other Windows versions.

Command-line tools generally provide more options than GUI-based tools and that’s especially true for tools working with complex SW such as media files, which can be created with many different types of codecs, containers, and formats. Most GUI-based tools use command-line tools on the back-end, but GUIs are rarely able to incorporate all the possible combinations of complex commands and options of those tools into their designs. It’s difficult to design GUI’s that can accomplish difficult tasks and still be easy to use. Because GUI-based application designs are often driven primarily for ease-of-use and wide appeal, functionality and complexity are necessarily reduced in order to accomplish those goals. Command-line tools are the opposite, they are more difficult to learn and to use, but are generally able to accomplish a wider and more sophisticated range of tasks.
Advantages – faster execution, specialized tasks can be accomplished by executing a single script, flexibility/customization (adding tools, changing options, etc.), free, uses less system resources
Disadvantages– requires coding or understanding code, takes more time and effort to configure, less intuitive
Advantages – quicker learning curve, more intuitive visually and for multitasking, more complete viewing and listing of information, easier switching between commands
Disadvantages – slower execution (additional programs are often required for processing ID3 tags or to repair VBR headers), requires more system resources (video, drivers, mouse, etc.), limited options for advanced tasks (especially for free versions), limited availability of easy-to-use but highly configurable applicaions
The command-line tools used in this guide are:
MP3Wrap (ver 0.5) – Wraps two or more mp3 files into a single file. The command-line executable is mp3wrap.exe.
ID3 mass tagger (ver 0.78) – Copies the ID3 tag to the merged file. This is the download link for the older freeware version, which is the version used in this guide. A newer version (1.21.25) is available here for both 32-bit and 64-bit systems, but it non-free shareware. It includes a GUI and a command-line version.
MP3Val (ver 0.1.8) – Validates and fixes MPEG stream, frame, and header errors. Includes both GUI and command-line versions. The command-line executable is mp3val.exe.
Because MP3Wrap strips and replaces the ID3 tags with its own information, ID3 is used to copy the tags from one of the files. MP3Val repairs any errors in the pre-merged files copied into the merged file or produced during the merging process.
Command-line syntax useage for this guide and in the batch script:
The batch file provides an option to use either the Windows command-line or MP3wrap to merge the files.
The command to merge mp3 files with Windows command-line:
copy /b file1.mp3+file2.mp3+file3.mp3 outputfile.mp3
/b = binary file
Command to merge mp3 files with MP3wrap:
mp3wrap outputfile.mp3 file1.mp3 file2.mp3 file3.mp3
additional commands for MP3Wrap (ver 0.5): mp3wrap_cmd_help:
The command-line syntax to copy the ID3 tags from input file1 to the output file with ID3:
id3.exe -D file1.mp3 outputfile.mp3
-D = duplicate tags from filename
additional commands for ID3 (ver 0.78): id3_078_help
Command-line syntax to fix and validate the output file with MP3Val:
mp3val outputfile.mp3 -f -nb -si
-f = try to fix errors
-nb = delete .bak files (suitable with -f)
-si = suppress INFO messages
additional commands for MP3Val (ver 0.1.8): mp3val_cmd_help
If using the provided batch file (see below), two steps are required.
1. Prepare the mp3 files
Ensure that the mp3 files to be merged have the same frequency, bitrate, and MPEG coding and layering. Otherwise, the output file may contain non-apparent errors, even if no errors were displayed during the merging process.
2. Drag and drop the mp3 files onto the batch file to merge
Drag and drop the mp3 files all at once and in the order to be processed by the batch script. Rename/renumber the files as necessary to obtain the right order.
Ensure that the file extension is changed to “bat” before using.
blogferret.com – id3.exe – ideal tool for tagging and renaming MP3 files
alexenglish.info – Concatenating MP3 Files in Linux
cephas.net – Merge multiples MP3 files into one
ghacks.net – ID3 Mass Tagger


Note (11/2017): DiscoverArt no longer appears to be available. Instead, use the Album Art Downloader option below.
Useful information from Tinyapps.org that shows how to retrieve and embed cover art into audio files with MP3Tag and the command-line application DisCoverArt. The original Tinyapps blog post is reproduced in its entirety below:
If you have a huge MP3 collection and just want to batch download and embed cover art without verifying each cover individually (and iTunes’ “Get Album Artwork” is insufficient):
Another option is to download cover art with Album Art Downloader and embed it with Mp3tag:
Source: Tinyapps.org

Registered users - 12,421

Bad Behavior has blocked 1197 access attempts in the last 7 days.