14. March 2015 · Comments Off on Automate mp3 File Concatenation with Windows Command-line Tools · Categories: Audio, Command-line Tools, Windows · Tags: batch files
Last updated on 12/12/2022

Although it requires a bit more technical effort than GUI-based applications, merging mp3 files with the command-line allows for a faster and more complete merging process and more flexibility and customization options. This guide demonstrates how to use a batch file and free Windows command-line tools to concatenate two or more mp3 files, preserve the ID3 metadata, and repair and verify the integrity of the combined file. The information in this guide was tested on system running XP SP3 32-bit and should be similar for other Windows versions.

merging mp3s

Command-line vs GUI tools

Command-line tools generally provide more options than GUI-based tools and that’s especially true for tools working with complex SW such as media files, which can be created with many different types of codecs, containers, and formats. Most GUI-based tools use command-line tools on the back-end, but GUIs are rarely able to incorporate all the possible combinations of complex commands and options of those tools into their designs. It’s difficult to design GUI’s that can accomplish difficult tasks and still be easy to use. Because GUI-based application designs are often driven primarily for ease-of-use and wide appeal, functionality and complexity are necessarily reduced in order to accomplish those goals. Command-line tools are the opposite, they are more difficult to learn and to use, but are generally able to accomplish a wider and more sophisticated range of tasks.

Command-line

Advantages – faster execution, specialized tasks can be accomplished by executing a single script, flexibility/customization (adding tools, changing options, etc.), free, uses less system resources

Disadvantages– requires coding or understanding code, takes more time and effort to configure, less intuitive

GUI-based

Advantages – quicker learning curve, more intuitive visually and for multitasking, more complete viewing and listing of information, easier switching between commands

Disadvantages – slower execution (additional programs are often required  for processing ID3 tags or to repair VBR headers), requires more system resources (video, drivers, mouse, etc.), limited options for advanced tasks (especially for free versions), limited availability of easy-to-use but highly configurable applicaions

Command-line Tools for this Guide

The command-line tools used in this guide are:

MP3Wrap (ver 0.5) – Wraps two or more mp3 files into a single file. The command-line executable is mp3wrap.exe.

ID3 mass tagger (ver 0.78) – Copies the ID3 tag to the merged file. This is the download link for the older freeware version, which is the version used in this guide. A newer version (1.21.25) is available here for both 32-bit and 64-bit systems, but it non-free shareware. It includes a GUI and a command-line version.

MP3Val (ver 0.1.8) – Validates and fixes MPEG stream, frame, and header errors. Includes both GUI and command-line versions. The command-line executable is mp3val.exe.

Because MP3Wrap strips and replaces the ID3 tags with its own information, ID3 is used to copy the tags from one of the files. MP3Val repairs any errors in the pre-merged files copied into the merged file or produced during the merging process.

Command-line Examples:

Command-line syntax useage for this guide and in the batch script:

Merge Files

The batch file provides an option to use either the Windows command-line or MP3wrap to merge the files.

The command to merge mp3 files with Windows command-line:

copy /b file1.mp3+file2.mp3+file3.mp3 outputfile.mp3

/b = binary file

Command to merge mp3 files with MP3wrap:

mp3wrap outputfile.mp3 file1.mp3 file2.mp3 file3.mp3

additional commands for MP3Wrap (ver 0.5): mp3wrap_cmd_help:

Copy Tags

The command-line syntax to copy the ID3 tags from input file1 to the output file with ID3:

id3.exe -D file1.mp3 outputfile.mp3

-D = duplicate tags from filename

additional commands for ID3 (ver 0.78): id3_078_help

Fix and Validate

Command-line syntax to fix and validate the output file with MP3Val:

mp3val outputfile.mp3 -f -nb -si

-f = try to fix errors

-nb = delete .bak files (suitable with -f)

-si = suppress INFO messages

additional commands for MP3Val (ver 0.1.8): mp3val_cmd_help

Merging mp3 Files: Process

Steps

If using the provided batch file (see below), two steps are required.

1. Prepare the mp3 files

Ensure that the mp3 files to be merged have the same frequency, bitrate, and MPEG coding and layering. Otherwise, the output file may contain non-apparent errors, even if no errors were displayed during the merging process.

2. Drag and drop the mp3 files onto the batch file to merge

Drag and drop the mp3 files all at once and in the order to be processed by the batch script. Rename/renumber the files as necessary to obtain the right order.

Batch File Processing Steps:

  1. Display the order of the mp3 files to be processed
  2. Ask the user to select between merging the files with the Windows command-line or MP3Wrap
  3. Merge the mp3 files into a temp file, “temp_MP3WRAP.mp3”
  4. Transfer the ID3 tags from the first mp3 file to the temp file with ID3
  5. Fix and validate the temp file with MP3Val
  6. Rename the temp file to the first mp3 file and append “_merged” to the file name
  7. Exit

Example Batch File:

Ensure that the file extension is changed to “bat” before using.

mergeMP3_cects.bat

References:

blogferret.com – id3.exe – ideal tool for tagging and renaming MP3 files

alexenglish.info – Concatenating MP3 Files in Linux

cephas.net – Merge multiples MP3 files into one

ghacks.net – ID3 Mass Tagger

Print Friendly, PDF & Email
Share
22. February 2013 · Comments Off on Copying Directory Structures without Files · Categories: Batch Files, Command-line Tools, Windows · Tags: File Tools, Freeware/Open Source
Last updated on 09/25/2022

Recreating directory structures can be a tedious and error-prone chore, especially if using the right-click method to create multiple structures and folders. This guide describes three methods to easily copy directory structures (without files) in Windows: (1) with the command line, (2) with GUI tools dedicated for that purpose, and (3) by configuring a freeware file manager, FreeCommander, to enable this function.

https://clker.com

Copying Directory Structures from the Command-line

For those comfortable with the command-line, two commands that can be used for this purpose are the Xcopy and Robocopy, both of which have tons of options. Although others, such as the FOR command could also be used, Xcopy and Robocopy are by far the most popular tools used for this purpose.

Xcopy

Xcopy is included in systems up to Windows 8. XCOPY stands for extended copy. It’s a more powerful version of copy with additional features that can copy files, directories, and whole drives. Note that although Xcopy is included with most versions of Windows, it has been deprecated in favor of RoboCopy.

To use Xcopy to clone a directory without files, use the following syntax:

xcopy /t /e "C:\Your Folder" "C:\New Folder"

/t = Copies the subdirectory structure, but not the files

/e = Copies subdirectories, including any empty ones

When using Xcopy with the above switches, you may be asked to specify whether the target is a directory or a file before the Xcopy command executes, but if the command is executed from a batch file, no user interaction is required.

Note: Xcopy doesn’t display any progress or completed operations information when executed. If the target directory doesn’t exist, it will be created.

Additional Xcopy commands can be found here.

Robocopy

Robocopy stands for “Robust file copy.” It’s a standard feature for Windows starting with Vista. It’s can also be installed in WinXP as part of the Windows Resource Kit.

To use Robocopy to clone a directory without files, use the following syntax:

robocopy "C:\Your Folder" "C:\New Folder" /e /xf *

same as above but without displaying the status:

robocopy "C:\Your Folder" "C:\New Folder" /e /xf * >nul

same as first example and creates a log (overwrites existing log):

robocopy "C:\Your Folder" "C:\New Folder" /e /xf * /log:yourlogfile.log

same as first example and appends to log (appends to existing log):

robocopy "C:\Your Folder" "C:\New Folder" /e /xf * /log+:yourlogfile.log

Copy only the top level sub-folders (sub-folders in the source directory)

robocopy "C:\Your Folder" "C:\New Folder" /e /LEV:2 /xf *

/e = Copies subdirectories, including empty ones.

/LEV: n = Copy only the n LEVels of the source. For n=2, only the top level sub-folders will be copied

/xf = Excludes files matching the specified names or paths. Wildcards “*” and “?” are accepted

Additional Robocopy commands can be found here.

Note: Robocopy displays progress and completed operations information when executed as shown in the below screenshot. If the target directory doesn’t exist, it will be created.


Download example xcopy and robocopy batch files:

  xcopybatch.bat (582 bytes, 3,447 hits)

  robocopybatch.bat (653 bytes, 2,799 hits)

Note: Remove the .txt extension before using either batch file.


Freeware GUI Tools for copying Directory Structures

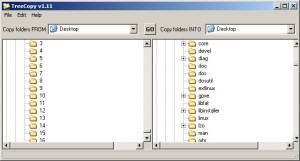
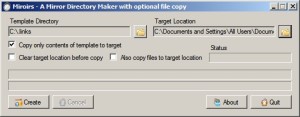
Two easy-to-use GUI (graphical user interface) apps dedicated specifically to creating directory structures without files are TreeCopy and Miroirs:

TreeCopy – Portable and freeware. Runs on Win95 to Win8.

treecopy screenshot

Miroirs – Freeware. Requires installation. Runs on XP/Vista/Win7

Miroirs screenshot

xcopy Frontend – Freeware. Portable. Runs on Windows XP or later. Provides an overview of all available parameters and makes it easy to select the needed parameters. Each parameter can be activated by clicking on it. The finished command line can be copied or executed directly.


FreeCommander setup to copy Directory Structures

FreeCommander is a freeware file manager that can be configured to copy directory structures using a customized batch file with the Xcopy and/or Robocopy commands. FreeCommander Ver. 2009.02b was used for this example. These instructions are modified from those provided on the FreeCommander forums.

FreeCommander Instructions

Create a batch file with the following code and save it with any name desired such as “copyFolderStructure_freecommander.bat.” For Xcopy the batch file’s main code consists of:

xcopy %1 %2 /t /e

%1 and %2 are the first and second parameters passed to the batch file (structure to copy and target)
The /t and /e options are the same as above

For Robocopy the batch file’s main code consists of:

robocopy %1 %2 /e /xf *

%1 and %2 are the first and second parameters passed to the batch file (structure to copy and target)
the /e and /xf * options are the same as above


Download example xcopy and robocopy batch files for FreeCommander:

  freecommander_xpcopy.bat (763 bytes, 930 hits)

  freecommander_robocopy.bat (773 bytes, 786 hits)


Note: a pause may be entered at the end of either of the batch files below to keep the command window open for viewing the output. Remove the _.txt extension before using.


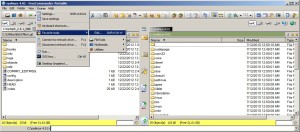
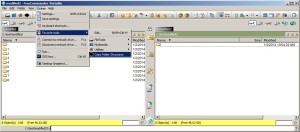
From the menu, select Extras->Favorite Tools->Edit or use (SHIFT+CONTROL+Y). Click the image below to enlarge.

freecommander menu

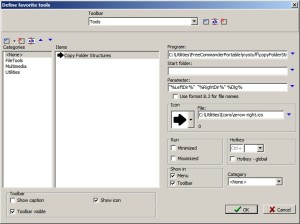
Select none from the left-hand column named Categories, then click once in the Items column.

FreeCommander Tools Configuration

Use the Items:Add to list button that appears above the Items column to create an item, for instance Copy Folder Structure.

Select Seek program by clicking the blue arrow next to the program field to navigate to and select the saved batch file’s (e.g. C:\tools\copyFolderStructure_freecommander_robocopy.bat) full path into the program field.

Enter the following into the parameter field:

"%LeftDir%" "%RightDir%" %Dlg%

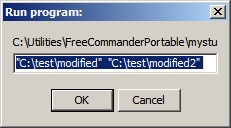
The variables, %LeftDir% and %RightDir%, pass the address of the left and right folders to batch file parameters %1 and %2. The %Dlg% variable is optional and may be omitted if desired. It is used to display a Run program window (screenshot below) before actually starting the script to allow the folder names to be verified. It also provides a way for the operation to be cancelled.

dialog

If desired, add an icon by using the blue button next to the icon field to navigate to the icon’s location.

Make sure the boxes are checked as in the Define Favorite Tools screenshot above before hitting OK.

Tool Selection
The toolbar now contains an entry for copying Folder Structures. The tool can be selected from the menu with Extras->Favorite Tools->Name of your tool or by using the favorites icon (make sure Extras is enabled in Extras->Settings->View->Toolbar if it’s not visible on the toolbar).

Using FreeCommander

To use, select the structure to copy in FreeCommander’s left pane and select the target directory in the right pane. Select and click your tool from the toolbar or menu as described above. After the Run program dialog appears, click OK to continue.

FreeCommander Select

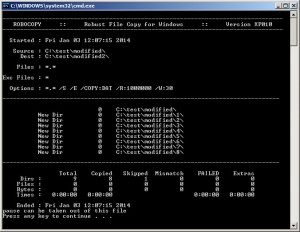
Xcopy doesn’t provide an option to display progress or completed operations. However, with Robocopy, the output will display the copy operation details as shown below (a pause was used in this batch file):

RoboCopy Output

Robocopy Output

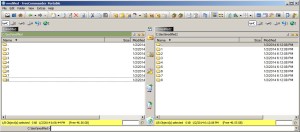
If no errors occur, the folder structure will be copied as in the following screenshot:

FreeCommander copied

Print Friendly, PDF & Email
Share
01. May 2011 · Comments Off on Using the CLI and other Linux Tips · Categories: Command-line Tools, Linux · Tags: Shells/CLI
Last updated on 03/28/2019

Joshua Price regularly contributes useful, easy-to-understand information on Linux at MakeTechEasier.com. His articles should be of interest to all Linux users, regardless of experience level. Below are the links to some of his useful and interesting Linux-related articles at MakeTechEasier.com. Be sure to check out his other Linux-related articles there as well.

Bash command-line

Become an APT guru

Beginner’s Guide to Git

Mastering the Bash History

8 Useful and Interesting Bash Prompts

More Useful and Interesting Bash Prompts 

The Beginner Guide to Writing Linux Shell Scripts

Making The Linux Command Line A Little Friendlier

From Noob to Ninja – Your Guide to Mastering Linux

How to Multitask at the Linux Command Line with Screen


Print Friendly, PDF & Email
Share
06. February 2010 · Comments Off on Automate Zipping Tasks using the Command-line Interface · Categories: Batch Files, Command-line Tools, Windows · Tags: Archiving Tasks, batch files
Last updated on 02/05/2022

This guide demonstrates how to automate repetitive compression tasks using batch files with two popular free archiving tools, the command-line utility for IZArc (freeware) and the standalone console version of 7-Zip (7-Zip Extra: standalone console version). For using the WinRAR command-line tools, see this post.

compression icon

Automating compression tasks using batch files or other scripting languages makes it simple and fast to compress, copy, rename, and move files from the same folder(s) when it’s necessary to do so on a regular basis.

This guide covers the use of two free archiving utilities, the command-line add-on utility for IZArc and the standalone console version for 7-Zip. Using either of these utilities to automate archiving needs is fairly easy to do, costs nothing, and saves time. Although this guide is designed to enable the user to accomplish this task quickly and easily, it is assumed that the reader is already familiar with creating and using batch files and has some experience with using compression utilities. WinXP was used to verify the information in this guide.

Step 1. Download one of the following (32 bit versions were used for this guide)

The versions used for this guide were: 7-Zip ver 18.01 (2018-01-28) for Windows:, IZArc Version 4.1, and IZArc command-line Add-On Version 1.1.

Note: This guide uses the standalone console version of 7-Zip (7za.exe), which supports only the 7z, cab, zip, gzip, bzip2, Z and the tar formats, and unpacks Z, lzma, CAB formats. The full version of 7-Zip (installable and portable versions) contains a command-line executable (7z.exe) that supports additional formats and is explained in the 7-Zip help files. 

The IZArc command-line utility creates ZIP, CAB, LHA, BH, JAR, TAR, TGZ, and TBZ formats, and extracts ZIP, RAR, ARJ, CAB, LHA(LZH), ARC, ACE, GZIP, BZIP2, TAR (TGZ, TBZ2), UUE, ZOO, JAR formats. For IZArc, the command-line executables are izarcc for the compression function and izarce for the extraction function.

Step 2. Install the utility

For 7-Zip:
Extract the 7-Zip standalone console version to a location of your choice, e.g., C:\7zipCL or C:\Program Files\7zipCL.

For IZArc:
Extract the IZArc command-line Add-on to a location of your choice or to the default location (e.g., C:\Program Files\IZArc).

Step 3. Test the installation (optional)

Open a CMD window by hitting the Start button, enter “cmd” and press “OK”. Use cd to navigate to the 7-Zip and/or IZArc installation folders and execute the following:

For 7-Zip:
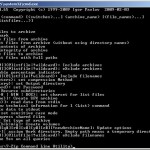
Type “7za” and then press ENTER. If working correctly, you should see the usage commands for 7-zip as shown in the top left thumbnail (click the picture to enlarge):

For IZArc:
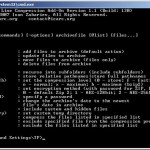
Type “izarcc” and then press ENTER. If working correctly, you should see the usage commands for IZArc as shown in the top right thumbnail (click the pictures to enlarge and view content):

Step 4. Create/modify batch file(s)

For the sake of simplicity and to focus on quickly demonstrating the use of these two compression utilities, this guide includes two simple example batch files (one for IZArc and another for 7Zip) that compresses all files from a folder into a single zip archive with a unique date suffix, moves the zip archive to another folder, and optionally deletes the original files. For both batch files, the folder “zipdir” contains the files to zip and the folder “movedir” is where the completed archives are moved.

Depending on which utility you wish to use, click one of the following links to open the batch file text in a new window where you can cut and paste it into your text editor or download it: testizarc.bat (IZArc) and/or test7zip.bat (7-Zip). Note: if you use either batch file be sure to:
remove “_.txt” from the file name to change the extension to .bat
– create the “zipdir” and “movedir” folders
– change paths as required in the script
– copy or move some files to be archived to the “zipdir” folder

Of course, either batch file can be modified to your own needs with a text editor, including changing the name or locations for the zip folder (zipdir) and move folder (movedir)

7za command for the 7-Zip batch file (test7zip.bat):

7za a -tzip "%movedir%\%myfolder%_%TODAY%.zip" -r "%zipdir%\*.*" -mx5
  • 7za – this starts the 7-Zip command-line executable.
  • a – command to add files to the archive.
  • -tzip – (optional) switch to set the type of archive. A zip file is the default compression format.
  • %movedir%\%myfolder%_%TODAY%.zip – the name of the archive to create.[“%movedir%” is the folder where the archive is to be created. “%TODAY%” is today’s date and time variable added to the zip archive name to insure a unique archive name is created each time the batch file is executed. The parentheses are optional unless there are spaces in the file path. Finally, “.zip” is the type of archive to be created.]
  • -r – (optional) recurse sub-directories
  • %zipdir%\*.* – the files and subdirs to be archived. Everything in folder “zipdir” (this includes any subfolders when using the -r switch).
  • -mx5 – (optional) switch to set compression method. In this case, it’s zip mode, compression level 5 (level 5 is normal compression which is the default level).

When using the zip format and normal compression, the optional switches can be eliminated and the command shortened as shown below:

7za a "%movedir%\%myfolder%_%TODAY%.zip" "%zipdir%\"

IZArc command for the IZArc batch file (testizarc.bat):

izarcc -a -r -p -cx "%movedir%\%myfolder%_%TODAY%.zip" "%zipdir%\*.*"
  • izarcc – starts the izarcc compression executable.
  • -a – adds files to the archive.
  • -r – (optional) recurses into subfolders (include subfolders)
  • -p – (optional) stores relative pathnames (maintains directory structure)
  • -cx – sets the compression level to maximum.
  • %movedir%\%myfolder%_%TODAY%.zip – the name of the archive to create.[“movedir” is the folder where the archive is to be created. %TODAY% is today’s date and time variable added to the zip archive name to insure that a unique archive name is created each time the batch file is executed. The parentheses are optional unless there are spaces in the file path. Finally, “.zip” is the type of archive to be created.]
  • %zipdir%\*.* – the files to be archived. In this case, it’s all the files in the folder ” zipdir” (this includes any subfolders using the “-r” command).

Currently, the IZArc help file for the IZArc program, IZArc.chm, contains limited information for the izarcc (compress) or izarce (extract) command-line functions; however, the command-line Add-on utility does include a text manual (manual.txt) that explains the commands and includes some examples for their use.

Optional switches can be eliminated and the command shortened as shown below:

izarcc -a -cx "%movedir%\%myfolder%_%TODAY%.zip" "%zipdir%\"

Using List files

Added 03/05/2013

List files are files that contain a list of one or more files and/or directories separated by new line symbols. Both the 7-Zip and IZArc command-line utilities can use list files for processing files and directories. 7-Zip uses UTF-8 encoding for list files by default, but the encoding can be changed at the command-line using the “-scs” switch if necessary (see the command-line version section in 7-zip.chm for further information).

The command-line syntax for compressing files and/or directories with a list file:

For 7-Zip:

7za a -tzip "C:\Your Folder\yourarchivename.zip @"C:\Your Folder\yourlistfile.txt"
  • 7za – the 7-Zip command-line executable.
  • a – add files to the archive command.
  • -tzip – set archive type to a zip file (optional unless using another compression format).

Note: Using list files with older versions of 7-Zip may be slow because 7-Zip will scan entire directories and/or drives of files and folders in the list file before archiving them. The issue is documented here.

For IZArc

izarcc -a -r -p -cx "C:\Your Folder\yourarchivename.zip @"C:\Your Folder\yourlistfile.txt"
  • izarcc –starts the izarcc compression executable.
  • -a – adds files to the archive.
  • -cx – sets the compression level to maximum.
  • -r – recurse into subfolders (include subfolders)
  • -p – store relative pathnames (maintains directory structure)

Examples for a list file and a batch file to illustrate using a list file with the 7-Zip and IZArc command-line utilities are below. The batch file contains commands for both utilities using a single list file. Be sure to change the file and path names as appropriate for your situation and the batch file extension to bat before using:

zip_listfile.bat

mylistfile

Summary

It’s fairly easy to automate archiving tasks using a simple batch file using either of the two free utilities covered in this guide. For basic needs, the command-line utility for IZArc or the 7-Zip standalone console version (7za.exe) should suffice. For more complex requirements, the full version of 7-Zip (7z.exe) contains additional features for more sophisticated archiving tasks from the command-line.

For more information and examples for using the 7-Zip command-line, also see the following:

Dot Net Perl’s article, 7-Zip Command-line examples

Codejacked’s article, ZIP Up Files from the command-line

The official 7-Zip Manual, 7ZIP manual & documentation


Print Friendly, PDF & Email
Share
conditions
">Bear

Bad Behavior has blocked 1753 access attempts in the last 7 days.

Private international