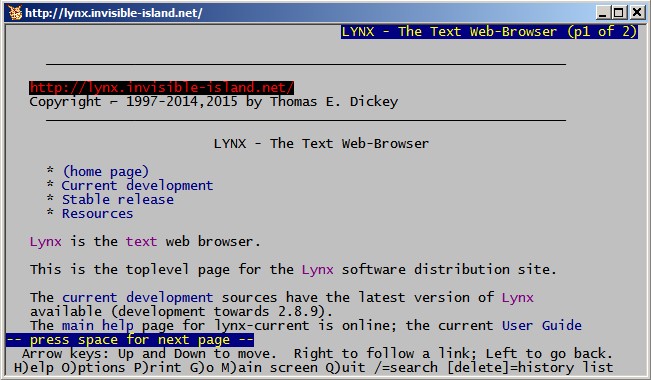
Lynx is a text-only web browser originally designed to run on UNIX, but today it also runs on Linux, VMS, MacOS, Windows and other platforms. It was initially developed by a team of University of Kansas students in 1992 for distributing information on a campus-wide information system and as a Gopher client, but it quickly became popular with visually impaired users because of its text-to-speech friendly interface. Although less used today as part of text-to-speech translating systems due to the technological improvements in screen readers, Lynx is still developed, useful, and it’s included as part of many Linux and UNIX distributions, including Cygwin. Lynx is licensed under the GNU General Public License.
Release built with curses (not color-style)
Uses for Lynx:
Reading documentation or downloading files in a text-based environment
To access websites without graphical displays
For use on low bandwidth Internet connections
For use on older and slower computer hardware
For fast, safe browsing of text-based web sites
Search Engine View Emulation
Incorporating into scripts and to automate tasks
Advantages of Lynx:
Fast, free, and safe
Handles cookies
Has many options
Multilingual
No ads
Release built with curses (color-style)
Release built with slang
Using Lynx:
Browsing with Shortcuts:
To start browsing, press “g” on the keyboard, enter a website URL and press enter.
Use the “Right Arrow” or “Enter” key to open links.
Press the “Left Arrow” key to go back to the previous page.
Use the “Up” and “Down” arrow keys to scroll up or down.
Use the “Control + Z” keys to toggle max screen mode.
Use the “Control + B” keys to go back to the previous page.
Use the “Control + F” keys to go to the next page.
Use the “Control + A” keys to jump to the beginning of the current page.
Use the “Control + E” keys to jump to the end of the current page.
Use the “Control + L” keys to refresh the document of garbled text.
Use the “Control + R” keys to reload the document.
Use the “Control + K” keys to display a list of currently set cookies.
“h” or “?” keys for help.
“k” key to display key mappings.
“o” key for user options.
“d” key to download from a link.
“L” key displays all URLs on the page.
“p” key for print options.
“\” key to display the web page source code.
“/” or “s” keys to search within the displayed web page, use “n” for next occurrence.
“a” key adds the current document to bookmarks.
“v” key displays bookmarks.
“r” key removes a bookmark when positioned over that link.
“V” key displays visited links for the current session.
“u” key goes back to previous document.
“m” key jumps to home page.
“!” key spawns a command shell.
“=” key provides information about the current URL and current link, such as owner, size, mod date, and server type.
This guide demonstrates how to quickly and easily create custom 640×480 splash images for Grub4Dos, GRUB, and Syslinux menus using the Windows version of ImageMagick. The information in this guide was tested with Grub4Dos ver 0.4.4, GRUB ver 0.97, and Syslinux ver 4.04. Both of these Grub4Dos and GRUB versions have nearly the same requirements for splash images so that the same images can be used by either one. The formats are xpm for GRUB/Grub4Dos and png/jpg for Syslinux.
This guide does not cover splash images for GRUB2, the newest version and replacement for GRUB, which only recognizes the .tga, .jpeg, and .png image formats. GRUB is now officially known as GRUB Legacy, and while no longer developed as of version 0.9x, it is still being supported and enhanced, so GRUB will continue to remain a very usable boot-loader for the immediate future. Syslinux graphical menus are generated using the vesamenu.c32 module, which must be included in the boot medium. Syslinux Hi-color menus, like GRUB and Grub4Dos menus, also use a 640×480 size splash image, but have slightly different requirements as explained below. Also, Grub4Dos and GRUB have some splash screen requirements that are not specified in the Syslinux documentation, so apparently those particular graphical attributes are either not applicable or have no limitations in Syslinux.
This is a quick and dirty method that was tested to work as specified for this guide. The aim of this guide is to quickly generate custom splash images from existing images rather than to create works of art. As such, the quality of the finished images largely depends on the initial quality and size of the original image files.
The requirements for Grub4Dos or GRUB splash screen images are:
The image must use the .xpm format (.xpm files are usually g-zipped for faster loading).
The image must be exactly 640×480 pixels in size.
The image can’t have more than 14 colors.
The requirements for Syslinux Hi-color splash screen images are:
The image must be in the .png or .jpg format.
The image must be exactly 640×480 pixels in size.
Image depth and number of colors requirements appear to be unspecified. For this guide, the depth is set to 16 bits and the number of colors is set to 14 in the ImageMagick convert command line to obtain a smaller file size. For some images, the user may wish to increase the number of colors for better quality results.
Tools: In Windows, the only tools required to create splash images are the ImageMagick freeware graphical image suite and a text editor to create batch files such as notepad. ImageMagick is a command-line only tool that’s fairly easy to use. As a command-line application, commands are executable from batch files or with other scripting languages. The self-installing version of ImageMagick automatically sets the registry entries, making it possible to execute it from any directory. If using the portable version, the path variable needs to be set manually or specified in a batch file to achieve this functionality. ImageMagick portable for Windows, ImageMagick-6.7.4-Q16-windows.zip, was used for this guide and tested on PCs running Vista and WinXP.
Image files to convert: In most cases, make sure images are in the .bmp, .jpg, or .png format and are 640×480 pixels in size or have the same aspect ratio (e.g. 800×600, 1024×768, etc.) before converting them. If images are in any other format or don’t have a 640×480 aspect ratio, re-size them and change the format to .bmp, .jpg, or .png before using ImageMagick. For Grub4Dos or GRUB boot menu screens, if another original image format is used, such as .gif, ImageMagick will process it without error, but the image may be distorted or render incorrectly. Files can easily be re-sized and converted to .bmp, .jpg, or .png formats using most graphical editing programs already on your computer. Note that the .png format usually results in a slightly smaller file size than the .bmp format. Note: ImageMagick’s resize operator is designed to produce the best possible result for the requested image size (i.e. 640×480) and ignores aspect ratio if image distortion occurs during the conversion process. Thus the re-size operator does not necessarily scale the image! That is why it’s important to use true 640×480 pixel images (or images with the same aspect ratio (e.g. 4:3) before converting them with ImageMagick. Make sure to verify image size after converting with ImageMagick. The final size of images must be exactly 640×480 to work as splash screens. ______________________________________________________________________________
Steps to Create Grub4Dos and GRUB Compatible Splash Images:
Step 1: Download and Install ImageMagick
Step 2: Convert Image Files into Grub4Dos or GRUB Compatible Images with the ImageMagick command line:
Open a command window in Windows by clicking the Start button, select RUN…, then type “cmd” and click the “OK” button. In the command window, navigate to the directory where the files are located and use the following command to convert each file to a Grub4Dos and GRUB compatible splash image:
To install a Grub4Dos or GRUB splash image in menu.lst:
Copy the splash image to your HDD (e.g. hdo, hd1, etc.) or USB (e.g. sda1, sdb2, etc.) in the default folder or in a folder of your choice
Edit the menu.lst file to reflect the location of the splash image:
splashimage (hd0,0)/yourfolder/filename.xpm.gz
Batch file example:
Drag and drop single or multiple .bmp, .jpg, or .png images into the batch file to automatically convert them into GRUB or Grub4Dos compatible splash screen images. Click to open the file link in your browser and then cut and paste the code into a text editor or right click to download the batch file code. Be sure to change the file extension to .bat before using:
convert_grub_rev3a.bat (updated script with more options) _________________________________________________________________________
Steps to Create Syslinux Compatible Splash Images:
Step 1: Download and Install ImageMagick
Step 2: Convert Image Files into Syslinux Compatible Images using the ImageMagick command line:
Open a command window in Windows by clicking the Start button, select RUN…, then type “cmd” and click the “OK” button. In the command window, navigate to the directory where the files are located and use the following command to convert each file to a Syslinux compatible splash image:
Note: Increasing colors from 14 to a higher value in the above command can result in higher quality images, but also slightly increases the file size.
To install a Syslinux splash image:
Make sure the vesamenu.c32 module is installed to the boot medium (get it from the Syslinux com32\modules\ folder). Vesamenu.c32 is usually placed in the same folder or partition as the syslinux.cfg file.
Copy the splash image to your HDD (e.g. hdo, hd1, etc.) or USB (e.g. sda1, sdb2, etc.) in the default folder or in a folder of your choice
Edit the syslinux.cfg file to reflect the location of the splash image:
MENU BACKGROUND /yourfolder/yourfile.png
Batch file example:
Drag and drop single or multiple .bmp, .jpg, or .png images into the batch file to automatically convert them into Syslinux compatible splash screen images. Click to open the file link in your browser and then cut and paste the code into a text editor or right click the link to download the batch file code. Be sure to change the file extension to .bat before using:
This guide illustrates how to manually create a multi-boot multi-partition USB drive using both SYSLINUX and GRUB4DOS. Because many apps and Linux distros are coded and/or organized in a way intended to operate from dedicated single partition USB drives, they are often notoriously difficult to boot from multi-boot USBs. Thus, while many apps and distros state they are bootable from USBs, often this means they are bootable from single-purpose (and single partition) USB drives, often using UNetbootin or similar utilities. Seldom, if ever, are directions provided for installation to an existing multi-boot environment, or how to create a multi-boot USB in the first place. To get around this limitation, this guide demonstrates how to setup a USB drive to enable booting several apps and distros from a single partition and from multiple dedicated partitions.
Almost any distro or app can be made to boot from a USB, with some being easier than others. Sometimes it’s as easy as extracting files and folders from a zip file to the USB and installing a boot-loader. However, more often it’s not always so simple; especially when attempting to install apps or distros to a partition already cluttered with multiple ISOs, image files, compressed files, system files, configuration files and various folders. For the sake of brevity and simplicity, this guide covers selected apps and distros that were tested to work. By following this guide, it should become apparent how to install other apps and distros or updated versions of those that are included here.
For this guide, SYSLINUX is used as the primary boot loader. GRUB4DOS is used as a secondary boot-loader to chainload partitions (Chain-loading is a process where control passes from the boot manager to the boot sector) and to boot ISOs and other apps in the active partition. In this case, GRUB4DOS is used to pass control (chainload) to Syslinux installed on the dedicated partitions’ boot sectors (except for the active partition, which is directly booted with SYSLINUX). The advantage of GRUB4DOS is that currently, it’s MUCH easier to chainload partitions and to boot ISOs using GRUB4DOS than with SYSLINUX, which is really designed to chainload hard drive partitions rather than USB drive partitions. Also, some applications (like ISOs) can boot easily with GRUB (or GRUB4DOS), but not always with SYSLINUX. Usually, anything that will boot with GRUB can also boot with GRUB4DOS, as long as it’s installed to a FAT formatted partition (either FAT16 or FAT32). It’s also important to note that Syslinux is limited in that it can’t access files outside of its own partition. However, when GRUB4DOS and SYSLINUX are used together, this greatly expands the booting options for USB drives. So essentially, as used here, GRUB4DOS is used to boot ISOs and a few other apps on the active partition and to control (chainload) dedicated partitions containing a single app or distro. Once control is passed from GRUB4DOS, the dedicated partition automatically boots the application or app with SYSLINUX, which is installed to the partition’s boot sector.
It’s important to note that all the applications and distros installed to the dedicated partitions for this guide are already designed to boot with SYSLINUX, so all that’s necessary is to copy their files to a partition, install SYSLINUX to the partition’s boot sector, and setup GRUB4DOS to boot the partition in order to use the SYSLINUX default menu options included in the syslinux.cfg files. Using SYSLINUX to automatically boot dedicated partitions provides the advantage of being able to use the boot options in the default syslinux.cfg files that otherwise wouldn’t be available using a single boot-loader and without manually creating, editing and maintaining complex and excessively large syslinux.cfg and/or menu.lst files.
This guide is an extension of an earlier one, Booting DSL (Damn Small Linux) from a Multiboot USB Drive, which demonstrated how to add DSL to a working bootable (either single or multi-boot) single partition USB drive with SYSLINUX. Although creating multi-boot USBs can be accomplished in many other ways, after much trial and error, the method here may be one of the easier ways to boot several popular distros and apps from the same partition and/or from multiple partitions for USB drives. This guide assumes the user has some experience with booting external devices, using partitioning tools, creating Live CDs from ISOs, and has a basic knowledge of Linux, SYSLINUX, and GRUB4DOS.
SYSLINUX (ver 3.84 used for this guide, ver 3.86 also tested OK, but higher versions such as 4.02 may be incompatible with the distros and app versions used for this guide)
Note: The SYSLINUX version used to boot partitions must be compatible with any SYSLINUX module files included with the app or distro. That is why versions are provided — to insure compatibility. For instance, if you want to install a more recent version of Parted Magic to the USB and it contains an upgraded vesamenu.c32 module and you are using a previous version of SYSLINUX that doesn’t support that change; then you may not be able to boot the USB unless you also upgrade SYSLINUX to a compatible version .
Tested distros and applications used for this guide (download links are provided below in the article body):
Partition 1 (Device boot partition) Puppy Linux ver 4.31 (booted directly with SYSLINUX) SuperGrubDisk ver 0.9799 (booted directly with GRUB4DOS) WinME Non-Windows Based Image File W/ImageApp (booted directly with either SYSLINUX or GRUB4DOS)
Partition 2 (dedicated – primary) DSL (Damn Small Linux) ver 4.4.10-embedded (chainload boot with SYSLINUX from GRUB4DOS)
Partition 3 (dedicated – primary) Parted Magic LiveUSB ver 4.7 (chainload boot with SYSLINUX from GRUB4DOS)
Partition 5 (dedicated – logical) AVG Rescue USB ver 90-100429 (chainload boot with SYSLINUX from GRUB4DOS)
Partition 6 (dedicated – logical) Clonezilla Live (for USB – zip file) ver 1.2.4-28-486 (chainload boot with SYSLINUX from GRUB4DOS)
Note: If versions other than those shown above are used, the USB’s syslinux.cfg and/or menu.lst files, as well as Syslinux itself, may need to be updated to reflect this change and to boot correctly.
Hint: Downloading the above distros and apps to another USB drive, an external HD, or burning them to a CD will ease the task of copying and extracting them to the USB partitions later in this guide.
Text (*.txt) versions of the configuration files for SYSLINUX and GRUB4DOS are pre-configured and provided in this guide. Included are:
Here are the steps to follow to create a multi-boot and multi-partition USB drive:
About Partitioning and Formatting
First, decide on the number and size of the partitions needed to hold everything to be installed. Although not covered in this guide, it’s often a good idea to have at least a couple of extra partitions and some unallocated space for future expansion and for apps that are to be booted from dedicated partitions (to utilize multiple boot options). Note that any storage drive device is limited to a maximum of four primary partitions. To partition a drive with more than four partitions, it’s necessary to create at least one as an extended partition and to create one or more logical ones within that extended partition. More often than not, it’s possible to boot several apps and distros (especially ISOs) from the same partition (particularly the active partition), so sometimes it’s desirable to create a large active partition to hold several booted apps and some smaller ones just large enough to hold the apps or distros that require their own partitions. For simplicity, this guide uses a 2GB USB drive divided into five approximately equal primary partitions (3 primary, 2 logical) of about 400MB each. The first partition will boot multiple distros and apps, with the other four setup as dedicated partitions (booting a single app or distro).
1. Boot the PC with the Parted Magic LiveCD and use GParted to Partition the USB drive
a. Connect the USB drive and boot the computer using the Parted Magic LiveCD. In Parted Magic, start the GParted Partition utility and set it to display the USB drive. b. Use GParted to create three 400MB primary partitions and two 400MB logical partitions in an extended partition of 800MB. Be sure to format the partitions with FAT16 or FAT32 (It’s recommended to use either FAT16 or FAT32, but do not use both) and set the boot flag for the first partition. You can also provide identities for the partitions using labels. See the example GParted image below which uses three primary partitions and one extended partition. The partitions are labeled as 1, 2, 3, 5 & 6 (4 is the extended partition holding logical partitions 5 & 6. Partition 4 itself isn’t writable). Make sure no errors are showing for any partition before moving to the next step.
For step 2, Parted Magic can continue to be used; however, users may find tasks such as copying, moving and extracting files somewhat easier using a more familiar Linux distro such as Ubuntu, Puppy, etc. Parted Magic is suggested for steps 1 to 3 because it contains GParted, SYSLINUX, a file manager and LXTerminal all in one package, which are all used in this guide. In any case, a non-Windows environment such as Linux must be used to copy the files to all the partitions (except the boot partition) since Windows is only able to access the bootable (active) partition of USB drives.
2. Using Parted Magic or another Linux Distro, install Applications and Distributions
Note: The file ldlinux.sys shown in each of the following screen-shots will not exist until steps 3 and 4 are completed.
Partition #2 – DSL (Damn Small Linux) DSL can be booted two ways: (1) from it’s own partition, or (2) co-existing with other apps and distros on the same partition. This guide will boot DSL from its own partition (first method), using the default DSL syslinux.cfg file that comes with DSL which provides multiple booting options. The other method, installing DSL to co-exist with other apps and distros in a single boot partition (second method) was covered in a previous article: Booting DSL (Damn Small Linux) from a Multiboot USB Drive.
a. Download DSL Embedded. Ver 4.4.10-embedded used for this guide. b. Extract DSL Embedded to Partition #2 and copy all the files in the main folder to the root of the partition (erase the original folder afterward). The root of the partition should look like this:
Partition #3 – Parted Magic a. Download Parted Magic LiveUSB. Ver 4.7 used for this guide. b. Extract to partition #3 and place the two folders, pmagic and boot in the root of the partition (erase the original folder(s) afterwords). The root of the partition should look like this:
Note: Parted Magic is in it’s own partition to avoid boot conflicts. Parted Magic, like the other distros and apps installed to dedicated partitions, already comes with a customized syslinux.cfg file. Parted Magic’s syslinux.cfg file is located in the boot folder (DSL’s and AVG’s syslinux.cfg file are located in root, and Clonzilla’s is located in the syslinux folder). During the booting process, SYSLINUX automatically searches for the syslinux.cfg file in the following order:
Note: The boot order above shows why Parted Magic and many other distros and apps should be placed in their own partitions. Should another syslinux.cfg file be placed in root, it would be ignored and the Parted Magic syslinux.cfg file would always load since “boot/syslinux/syslinux.cfg” is first in the boot order. Of course, there are ways to get around this, but the goal of this guide is to create a multi-boot USB quickly and easily without modification to the original file contents and structure so that the default boot options for the installed apps and distros are used.
Partition #5 – AVG Rescue CD a. Download AVG Rescue (for USB Stick). Ver 90-100429 used for this guide (avg_arl_cd_en_90_100429.zip). b. Extract to Partition #5. The root of the partition should look like this:
Partition #6 – Clonezilla a. Download Clonezilla Live (for USB – choose the zip file). Ver 1.2.4-28-486 used for this guide. b. Extract to Partition #6. The root of the partition should look like this:
Partition #1 – Puppy Linux/SuperGrubDisk/WinME Boot Image/Anything else a. If you have a working frugal installation of Puppy Linux Ver 4.31 copy all of its files to a folder named “puppy”. The minimum files required for a frugal install of puppy 4.31 to a USB are: initrd, pup_431.sfs, usbflash, and vmlinuz. b. Download SuperGrubDisk ISO (ver 0.9799) and place the ISO in a folder named “sdg” (yes, “sdg” is correct). c. Download WinME Non-Windows Based Image File W/ImageApp and extract it to its default folder “winmec”. d. Try other programs of your own.
Note: Not all ISOs are bootable using GRUB4DOS. Often, identifying bootable ISOs is a trial and error process using various boot options to determine whether it’s possible to do so without modifying the ISO image. All the ISOs used in this guide were tested to insure they were bootable without modification.
Click here for the screen-shot of Partition #1, or scroll further down this page
3. In Parted Magic, install SYSLINUX to Partition Boot Sectors
Note: another excellent tool to perform steps 3 and 4 is Bootice V0.8.2010.1228, which operates in Windows and can access multiple partitions. It can analyze partitions, format the USB drive, install and restore MBRs and PBRs, and more. Bootice is fairly easy to use; see Easily Modify Boot Sectors with Booticefor more information.
In Parted Magic, open a LXTerminal window and type the following commands to install SYSLINUX to all partition boot sectors except for the boot partition (partition #1). Be sure to substitute your USB device in place of sdb(x). Press ENTER after each of the following commands:
Exit Parted Magic and boot the computer to Windows for the next steps.
The above commands install SYSLINUX to the partition boot sectors for the 2nd to 6th partitions (4th excluded), and places the file ldlinux.sys into each partition’s root directory. These commands make the partitions bootable using GRUB4DOS. The device itself is bootable because of the boot flag in the first partition.
Note: you will not see a response each time the above commands are executed unless there is an error.
4. In Windows, install SYSLINUX and the MBR for the USB Drive (use Windows for the remainder of Steps)
a. Exit Parted Magic and reboot the computer to Windows. Open My Computer to identify the Windows USB drive letter assignment.
Note that for hard drives, Windows can access multiple partitions, but for USB drives, Windows can only access a single bootable partition.
b. Open a CMD window using Start -> Run -> enter “CMD” and then hit OK. In the CMD window, navigate to the win32 folder of the extracted Syslinux folder. For example, if you extracted SYSLINUX to C:\syslinux-3.84, then cd to “syslinux-3.84\bios\win32” and enter the following command: “syslinux.exe -sfma x:” Be sure to substitute “x” with the letter assignment of your USB drive identified in My Computer.
This is an explanation of the above syslinux.exe command from the SYSLINUX Wiki: -s Safe, slow, stupid: uses simpler code that boots better. -f Force installing. -m MBR: install a bootable MBR sector to the beginning of the drive. -a Active: marks partition #1 active (=bootable)
(Note: Setting the boot flag was done already in GParted, but it won’t hurt to do it again).
The above command installs a bootable MBR to the first partition of the USB drive, making SYSLINUX the boot manager for the USB device.
5. Copy GRUB4DOS to Root of Partition #1
Because SYSLINUX is the primary boot-loader for the USB Drive, only two files are needed to boot GRUB4DOS: (1) “grub.exe” and (2) “menu.lst”.
a. From the extracted GRUB4DOS folder, copy and paste “grub.exe” to Partition #1 (see next section for menu.lst).
6. Create and Configure the syslinux.cfg file and menu.lst Files to Root of Partition #1
a. Save the following two files as syslinux.cfg and menu.lst (either open in your browser by clicking them to cut and paste or right click the links and save):
The syslinux.cfg file is used to set the configurable defaults for SYSLINUX. The menu.lst file sets the configurable defaults for GRUB4DOS. Note that the “l” in menu.lst is a small “L” and not the number “1”. Both files can be edited using a simple text editor.
7. Add Additional Modules to Root of Partition #1
Copy the following modules from the SYSLINUX extracted folder to the root of Partition #1:
reboot.c32 from “com32\modules” (required – adds an option to reboot the computer)
menu.c32 from “com32\menu” (required – displays the basic Syslinux menu shown below)
memdisk from “memdisk” (required – kernel to boot floppy images, disk images and some ISOs)
Optional: Save the following two files and save them to the root of Partition #1 (either open in your browser by clicking them to cut and paste or right click the links and save):
submenulst.txt (save as submenu.lst) Provides an extra menu for GRUB4DOS to boot other apps and distros if needed help.txt (save as help.txt) Provides a user-defined help menu when F1 is pressed while the Syslinux menu is displayed
Partition #1 should now look like this:
If you followed the above instructions, you should have a working multi-boot, multi-partition USB. The SYSLINUX boot screen should be similar to the screen-shots below when you boot the USB drive. If you receive boot errors when booting to or selecting from the SYSLINUX menu, try installing SYSLINUX to the partition boot sectors again (step 3) and reinstalling the SYSLINUX/MBR to the boot partition (step 4). Also, use GParted to view the partitions for any errors. Errors in GParted will display as a yellow triangular symbol for that partition.
Syslinux Boot Menu Screen GRUB4DOS Boot Menu Screen
Other free Windows based Multi-boot USB creation Tools:
XBOOT – Another tool to create multi-boot USBs and ISOs. No personal experience with this tool as of yet. Requires the .NET framework ver 4.
SARDU (Shardana Antivirus Rescue Disk Utility). No personal experience with this tool as of yet.
If you are having trouble getting DSL (Damn Small Linux) to boot on a multi-boot USB with SYSLINUX, then this guide may help. After experiencing the same problem and seeing other online complaints about it, I decided to create this guide.
This tutorial describes how to get DSL (Damn Small Linux) to boot from the boot partition of a working bootable USB flash drive currently using SYSLINUX as the boot loader.
Although many related guides on the web describe how to create multi-boot USB drives, many are lacking when it comes to DSL because: (1) a different boot loader such as GRUB is used (2) the instructions are for creating dedicated boot USBs using a single app or Linux distro, or (3) not enough details specific to DSL are provided.
Rather than create a comprehensive how-to for multi-boot flash drives, this guide limits itself to this particular distro, since other guides, including Create a Mulitboot Multipartion USB with Syslinux and Grub4Dos, provide instructions for successfully creating multi-boot USBs using other Linux distros and applications.
This tutorial applies if the following conditions are met:
1. You can successfully boot at least one other distro or application on the USB drive with SYSLINUX (Ver 3.81 was used for this guide)
2. You want to add DSL to create a multi-boot USB drive or you are unable to boot DSL on a USB drive with at least one other distro or application that currently boots with SYSLINUX
OK. Now for the instructions:
Download the Embedded Distribution of DSL:
Why use the embedded version? It’s provided in a zip file, so there is no need to extract and manipulate files from an ISO. The embedded version also comes with QEMU, which allows DSL to run within Windows and in Linux. So even if you can’t boot DSL from SYSLINUX, you can check the integrity of the DSL installation using QEMU by clicking dsl-base.bat in the DSL folder (see next step). The downside of running DSL with QEMU is that it will be extremely slow, about 5-6 times slower, than when it’s running natively. The DSL embedded version used for this guide was version 4.4.10. You can get the embedded version of DSL from here. The direct download link for the embedded version of DSL used for this guide is dsl-4.4.10-embedded.zip.
Create a Folder for DSL Embedded in the Root of the USB Drive’s Boot Partition and Unzip DSL Embedded to that Folder:
Pick any name you like. In my case, I made a folder named “DSLEmbedded” on my USB’s root. The reason for a separate folder is to avoid conflicting files that may already exist on the root for other distros or applications such as syslinux.cfg, knoppix folders, boot.msg, readme.txt and others. In fact, it’s preferable to put every distro in its own folder when you can, but that’s not always possible without complex folder organization schemes and/or file coding mods. Because of this, some distros should be in the root by themselves or installed to their own partition since they often use complex boot menus, they’re coded to work from root, and/or they have multiple files and folders (making upgrading and troubleshooting more complex when everything is installed to a single partition). However, DSL in a separate folder can coexist with many other distros using SYSLINUX as the boot-loader – you just need to edit the root’s syslinux.cfg file and experiment to see what can coexist with the least amount of work and conflict. Currently, I have DSL co-existing in the same partition with SuperGrubDisk, two versions of Puppy Linux, and several Windows apps in ISO format, all booting from the same syslinux menu and almost all of them in separate folders.
Note: When you unzip DSL embedded, it will place all its files in a folder named “dsl-4.4.10-embedded” by default. Take everything out of this default folder and put it in your folder (see screen-shot of my folder to the left). The reason for this is to refer to a basic folder name in the syslinux.cfg file, preferably one that without dashes, periods, or spaces.
Below are some thumbnail screen-shots showing the organization of the main partition, the Puppy400 folder, and the syslinux.cfg file. As with all of the screen-shots in this guide, click to enlarge them. Although outside of the scope of this guide, you can see Grub4Dos (grub.exe and menu.lst) are used to boot ISOs and other apps in multiple partitions which also have SYSLINUX installed in the boot sector.
Partition
Puppy400
Syslinux.cfg
For a more detailed view of the syslinux.cfg file, either click the link in this sentence to open in your browser or right click the link to save it.
Edit the Current syslinux.cfg in the Root drive to Create a Menu Entry for DSL and Save It:
This guide assumes a syslinux.cfg file already exits in the root and is used to boot at least one other distro or application.
Important: Pay particular attention to use of “/”, spaces, and capitalization in file paths! Below is a copy of my entry:
LABEL 6
MENU LABEL Boot Damn Small Linux (DSL)
KERNEL /DSLEmbedded/linux24
APPEND ramdisk_size=100000 lang=us apm=power-off vga=normal initrd=/DSLEmbedded/minirt24.gz nomce noapic quiet BOOT_IMAGE=knoppix knoppix_dir=/DSLEmbedded/KNOPPIX
Note: (1) Unless you used the same name, use the name of your folder in place of “DSLEmbedded” everywhere in the menu label above. (2) Depending on your needs and/or your system, you may want to change the DSL cheat codes in the APPEND line. See the DSL Cheat Codes Wiki for more information.
That’s all there is to it. Reboot your PC or laptop and you should now be able to boot DSL from the SYSLINUX boot menu!
If DSL still doesn’t boot, on another bootable USB drive (with SYSLINUX as the boot-loader), try installing Embedded DSL by itself to the root and not in a separate folder (move everything out of the folder and place it in root). In other words, and this is important – what was in the default folder (e.g., dsl-4.4.10-embedded or DSLEmbedded) should now be in the root of the partition. DSL should now boot with the default syslinux.cfg file. If that works, you are getting close; it’s just a matter of getting the file paths correct for the DSL folder you are going to use. Next, place DSL in a folder and move the syslinux.cfg file to root and then edit it using the instructions above to get it to boot. If successful, you can then duplicate those changes to the syslinux.cfg on the other USB drive. Also, you could just use the 2nd USB drive and add other apps and distros to it. Add one app or distro at a time then test to see if both boot, then add another distro and test again.
Because there are unlimited combination’s of distros and apps possible, differences in hardware, many multi-booting techniques and other factors, there is no way around some experimentation/trial and error testing to determine what works and what doesn’t.
If you are having trouble making a working multi-boot USB with SYSLINUX or just want to learn how, below are links to get started. If you still can’t get DSL to boot after that, then come back and recheck the suggestions again. Usually, most problems are minor such as using incorrect file paths or file names in the syslinux.cfg file.