06. January 2012 · Comments Off on Using the WinRAR Command-line tools in Windows · Categories: Batch Files, Windows · Tags: Archiving Tasks, batch files
Last updated on 08/06/2018

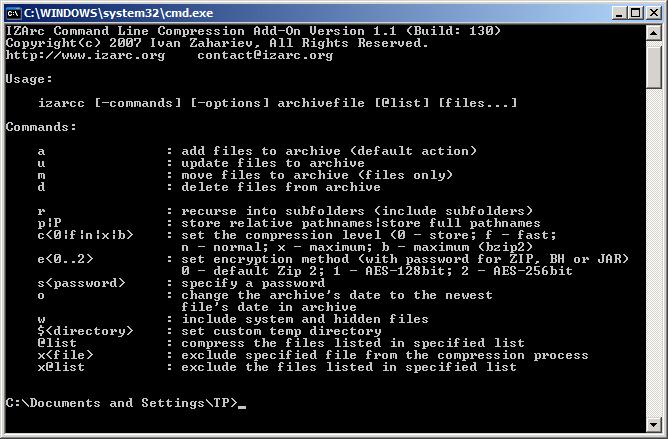
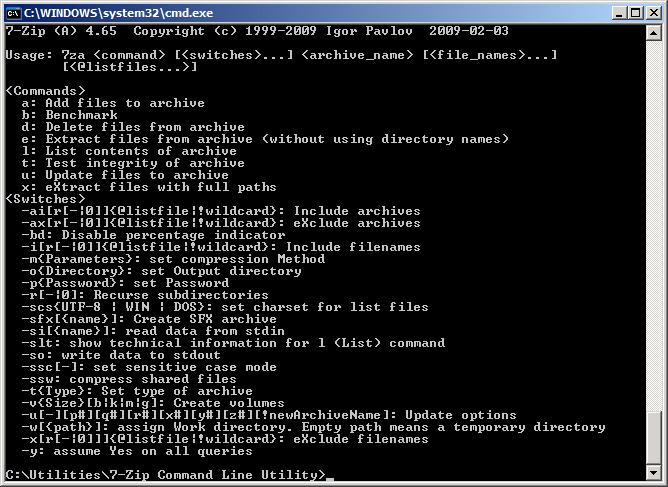
This guide describes the use of the WinRAR command-line tools (v5.01) for compressing and uncompressing files in a directory and their use in batch files (for IZArc and 7-zip, see this post). This guide is an extension of a previous post, Automate Zipping Tasks using the Command-line Interface that explained the use of the command-line tools for two free compression utilities, IZArc and 7-Zip. The information in this guide was tested on a Windows PC running Vista.

compression represented by a vise

WinRAR is a popular and powerful archive manager that can be used from the command-line or with scripting languages such as batch files. It includes two command-line tools, rar.exe and unrar.exe, where rar.exe compresses and unrar.exe uncompresses files. Both are located in the “C:\Program Files\WinRAR” folder in the installable version. Although WinRAR is shareware, it can be used on a trial basis for 40 days. Using WinRAR’s command-line tools is similar to those for IZArc and 7-Zip. The syntax for using the WinRAR executables is:

RAR or UNRAR <command> -<switch1> -<switchN> <archive> <files...> <@listfiles...> <path_to_extract\>

To get a listing of the options for the rar and unrar commands, open a command window, cd to the WinRAR directory, and type rar or unrar and then press enter (rar /?  or rar help may also be used, use rar >rar_cmds.txt or unrar >unrar_cmds.txt to print the command options to a file). For more detailed information, open the rar.txt file in the WinRAR directory which contains the RAR console version user’s manual.

Examples to compress a folder:

rar a -r yourfiles.rar *.txt

creates archive yourfiles.rar and compresses all .txt files in the current folder

rar a -r C:\yourfolder\yourfiles.rar *.txt

creates archive yourfiles.rar in C:\yourfolder and compresses all .txt files in the current folder and its subfolders

rar a -r C:\yourfolder\yourfiles.rar C:\otherfolder\*.txt

creates archive yourfiles.rar in C:\yourfolder and compresses all .txt files in otherfolder and its subfolders

rar a yourfiles 

creates archive yourfiles.rar and compresses all files in the current folder, but doesn’t include subfolders (note lack of extension; WinRAR will use the default extension .rar)

“a” command. Adds to the archive

“-r”  switch. Recurses subfolders

Examples to uncompress a folder: 

unrar x c:\yourfile.rar *.gif c:\extractfolder\

extracts all *.gif files from yourfile.rar to c:\extractfolder\ (trailing backslash required) and restores the folder structure

unrar e c:\yourfile.rar 

extracts all files in c:\yourfile.rar to the current folder (folder structure ignored)

“x” command. Extracts with full paths

“e” command. Extracts and ignores paths

Compression example using Multiple Switches:

rar a -r -ep -u -df -x*.bat e_archive.rar c:\test\*.*

compresses all new or updated files from c:\test and its subfolders to e_archive.rar, deletes the files after they are added to the archive, and excludes any files with a “bat” extension,

“a” command adds to the archive

“-r”  switch. Recurses subfolders

“-ep” switch. Adds files to the archive without including the path information. Multiple can exist in the archive with the same name.

“-u” switch. Equivalent to the “u” command when combined with the “a” command. Adds new files and updates older versions of the files already in the archive

“-df” switch. Deletes files after they are moved to the archive

“-x” switch. Excludes the specified file(s) from the operation

Basic rules for WinRAR:

  • When files or listfiles are not specified, all files in the current folder are processed
  • When specifying all files in a folder, yourfolder or yourfolder\*.* are equivalent
  • Folder structures are automatically saved in archives (but not automatically extracted)
  • WinRAR uses the .rar extension by default, but that can be overridden by specifying the zip extension in the archive name
  • Switches and commands are not case sensitive and can be written in either upper or lower case

Another point is that WinRAR doesn’t appear to install to the Windows path environment variable, so it must be specified either at a command prompt, set permanently in the environment variable settings, or specified in a batch file (WinRAR v3.71.0.0 was used for this guide and that may not be the case for all versions).

To set the Windows path environment variable temporarily at a command prompt or in a batch file, use the following command:

set path="C:\Program Files\WinRAR\";%path%

To set it permanently in the Windows path for your PC:

start–>Control Panel–>System–>Advanced system settings–>Advanced Tab–>Environment Variables–>System Variables–>Path–>Edit. Add the path ;C:\Program Files\WinRAR; to the end (don’t forget the single semicolons at the beginning and end). Hit OK three times.

Using WinRAR in Batch Files:

Two batch file examples are provided below, The uncompress_rar.bat file decompresses all .rar files from a folder and places the extracted files into another directory.

The compress_rar_rev2.bat file provides the following compression options for a user specified directory. Option 4 is the most commonly used structure and the most appropriate option in most cases:

  1. Compress files in dir individually (no subdirs)
  2. Compress files in dir and subdirs individually – no paths
  3. Compress all files in dir into a single archive (no subdirs)
  4. Compress all files in dir and subdirs into a single archive
  5. Compress all files in dir and subdirs into a single archive – no paths

Be sure to change the extension(s) to .bat before using either file and edit the folder paths as required. Both of the following batch files temporarily set the Windows path environment variable for the WinRAR application folder when executed.

Batch file downloads:

Print Friendly, PDF & Email
Share
09. December 2010 · Comments Off on Create Custom Grub4Dos, GRUB and Syslinux Compatible Splash Images · Categories: Batch Files, Graphics · Tags: batch files, Boot Loaders, Linux
Last updated on 12/07/2017

Syslinux Boot Menu ScreenThis guide demonstrates how to quickly and easily create custom 640×480 splash images for Grub4Dos, GRUB, and Syslinux menus using the Windows version of ImageMagick. The information in this guide was tested with Grub4Dos ver 0.4.4, GRUB ver 0.97, and Syslinux ver 4.04. Both of these Grub4Dos and GRUB versions have nearly the same requirements for splash images so that the same images can be used by either one. The formats are xpm for GRUB/Grub4Dos and png/jpg for Syslinux.

This guide does not cover splash images for GRUB2, the newest version and replacement for GRUB, which only recognizes the .tga, .jpeg, and .png image formats. GRUB is now officially known as GRUB Legacy, and while no longer developed as of version 0.9x, it is still being supported and enhanced, so GRUB will continue to remain a very usable boot-loader for the immediate future. Syslinux graphical menus are generated using the vesamenu.c32 module, which must be included in the boot medium. Syslinux Hi-color menus, like GRUB and Grub4Dos menus, also use a 640×480 size splash image, but have slightly different requirements as explained below. Also, Grub4Dos and GRUB have some splash screen requirements that are not specified in the Syslinux documentation, so apparently those particular graphical attributes are either not applicable or have no limitations in Syslinux.

grub4dos menu screenThis is a quick and dirty method that was tested to work as specified for this guide. The aim of this guide is to quickly generate custom splash images from existing images rather than to create works of art. As such, the quality of the finished images largely depends on the initial quality and size of the original image files.

The requirements for Grub4Dos or GRUB splash screen images are:

  • The image must use the .xpm format (.xpm files are usually g-zipped for faster loading).
  • The image must be exactly 640×480 pixels in size.
  • The image can’t have more than 14 colors.

The requirements for Syslinux Hi-color splash screen images are:

  • The image must be in the .png or .jpg format.
  • The image must be exactly 640×480 pixels in size.
  • Image depth and number of colors requirements appear to be unspecified. For this guide, the depth is set to 16 bits and the number of colors is set to 14 in the ImageMagick convert command line to obtain a smaller file size. For some images, the user may wish to increase the number of colors for better quality results.

Tools:
In Windows, the only tools required to create splash images are the ImageMagick freeware graphical image suite and a text editor to create batch files such as notepad. ImageMagick is a command-line only tool that’s fairly easy to use. As a command-line application, commands are executable from batch files or with other scripting languages. The self-installing version of ImageMagick automatically sets the registry entries, making it possible to execute it from any directory. If using the portable version, the path variable needs to be set manually or specified in a batch file to achieve this functionality. ImageMagick portable for Windows, ImageMagick-6.7.4-Q16-windows.zip, was used for this guide and tested on PCs running Vista and WinXP.

Image files to convert:
In most cases, make sure images are in the .bmp, .jpg, or .png format and are 640×480 pixels in size or have the same aspect ratio (e.g. 800×600, 1024×768, etc.) before converting them. If images are in any other format or don’t have a 640×480 aspect ratio, re-size them and change the format to .bmp, .jpg, or .png before using ImageMagick. For Grub4Dos or GRUB boot menu screens, if another original image format is used, such as .gif, ImageMagick will process it without error, but the image may be distorted or render incorrectly. Files can easily be re-sized and converted to .bmp, .jpg, or .png formats using most graphical editing programs already on your computer. Note that the .png format usually results in a slightly smaller file size than the .bmp format.

Note: ImageMagick’s
resize operator is designed to produce the best possible result for the requested image size (i.e. 640×480) and ignores aspect ratio if image distortion occurs during the conversion process. Thus the re-size operator does not necessarily scale the image! That is why it’s important to use true 640×480 pixel images (or images with the same aspect ratio (e.g. 4:3) before converting them with ImageMagick. Make sure to verify image size after converting with ImageMagick. The final size of images must be exactly 640×480 to work as splash screens.
______________________________________________________________________________

Steps to Create Grub4Dos and GRUB Compatible Splash Images:

Step 1: Download and Install ImageMagick

Step 2: Convert Image Files into Grub4Dos or GRUB Compatible Images with the ImageMagick command line:

Open a command window in Windows by clicking the Start button, select RUN…, then type “cmd” and click the “OK” button. In the command window, navigate to the directory where the files are located and use the following command to convert each file to a Grub4Dos and GRUB compatible splash image:

convert -resize 640x480 -colors 14 filename.bmp filename.xpm.gz

To install a Grub4Dos or GRUB splash image in menu.lst:

  • Copy the splash image to your HDD (e.g. hdo, hd1, etc.) or USB (e.g. sda1, sdb2, etc.) in the default folder or in a folder of your choice
  • Edit the menu.lst file to reflect the location of the splash image:

    splashimage (hd0,0)/yourfolder/filename.xpm.gz

Batch file example:

Drag and drop single or multiple .bmp, .jpg, or .png images into the batch file to automatically convert them into GRUB or Grub4Dos compatible splash screen images. Click to open the file link in your browser and then cut and paste the code into a text editor or right click to download the batch file code. Be sure to change the file extension to .bat before using:

convert_oldgrub_grub4dos_rev2.bat (drag and drop a single file or multiple files into this batch file)

convert_grub_rev3a.bat (updated script with more options)
_________________________________________________________________________

Steps to Create Syslinux Compatible Splash Images:

Step 1: Download and Install ImageMagick

Step 2: Convert Image Files into Syslinux Compatible Images using the ImageMagick command line:

Open a command window in Windows by clicking the Start button, select RUN…, then type “cmd” and click the “OK” button. In the command window, navigate to the directory where the files are located and use the following command to convert each file to a Syslinux compatible splash image:

convert -resize 640x480 -depth 16 -colors 14 yourfile.bmp yourfile.png

Note: Increasing colors from 14 to a higher value in the above command can result in higher quality images, but also slightly increases the file size.

To install a Syslinux splash image:

  • Make sure the vesamenu.c32 module is installed to the boot medium (get it from the Syslinux com32\modules\ folder). Vesamenu.c32 is usually placed in the same folder or partition as the syslinux.cfg file.
  • Copy the splash image to your HDD (e.g. hdo, hd1, etc.) or USB (e.g. sda1, sdb2, etc.) in the default folder or in a folder of your choice
  • Edit the syslinux.cfg file to reflect the location of the splash image:

    MENU BACKGROUND /yourfolder/yourfile.png

Batch file example:

Drag and drop single or multiple .bmp, .jpg, or .png images into the batch file to automatically convert them into Syslinux compatible splash screen images. Click to open the file link in your browser and then cut and paste the code into a text editor or right click the link to download the batch file code. Be sure to change the file extension to .bat before using:

convert_syslinux_rev2.bat (drag and drop single or multiple files into this batch file)

convert_syslinux_rev3a.bat (updated script with more options)
____________________________________________________________________

References:

Fedoraproject.org wiki – How to create a custom syslinux splash

ImageMagick – Resizing Images

Syslinux.zytor.com – Comboot/menu.c32


Print Friendly, PDF & Email
Share
06. February 2010 · Comments Off on Automate Zipping Tasks using the Command-line Interface · Categories: Batch Files, Command-line Tools, Windows · Tags: Archiving Tasks, batch files
Last updated on 02/05/2022

This guide demonstrates how to automate repetitive compression tasks using batch files with two popular free archiving tools, the command-line utility for IZArc (freeware) and the standalone console version of 7-Zip (7-Zip Extra: standalone console version). For using the WinRAR command-line tools, see this post.

compression icon

Automating compression tasks using batch files or other scripting languages makes it simple and fast to compress, copy, rename, and move files from the same folder(s) when it’s necessary to do so on a regular basis.

This guide covers the use of two free archiving utilities, the command-line add-on utility for IZArc and the standalone console version for 7-Zip. Using either of these utilities to automate archiving needs is fairly easy to do, costs nothing, and saves time. Although this guide is designed to enable the user to accomplish this task quickly and easily, it is assumed that the reader is already familiar with creating and using batch files and has some experience with using compression utilities. WinXP was used to verify the information in this guide.

Step 1. Download one of the following (32 bit versions were used for this guide)

The versions used for this guide were: 7-Zip ver 18.01 (2018-01-28) for Windows:, IZArc Version 4.1, and IZArc command-line Add-On Version 1.1.

Note: This guide uses the standalone console version of 7-Zip (7za.exe), which supports only the 7z, cab, zip, gzip, bzip2, Z and the tar formats, and unpacks Z, lzma, CAB formats. The full version of 7-Zip (installable and portable versions) contains a command-line executable (7z.exe) that supports additional formats and is explained in the 7-Zip help files. 

The IZArc command-line utility creates ZIP, CAB, LHA, BH, JAR, TAR, TGZ, and TBZ formats, and extracts ZIP, RAR, ARJ, CAB, LHA(LZH), ARC, ACE, GZIP, BZIP2, TAR (TGZ, TBZ2), UUE, ZOO, JAR formats. For IZArc, the command-line executables are izarcc for the compression function and izarce for the extraction function.

Step 2. Install the utility

For 7-Zip:
Extract the 7-Zip standalone console version to a location of your choice, e.g., C:\7zipCL or C:\Program Files\7zipCL.

For IZArc:
Extract the IZArc command-line Add-on to a location of your choice or to the default location (e.g., C:\Program Files\IZArc).

Step 3. Test the installation (optional)

Open a CMD window by hitting the Start button, enter “cmd” and press “OK”. Use cd to navigate to the 7-Zip and/or IZArc installation folders and execute the following:

For 7-Zip:
Type “7za” and then press ENTER. If working correctly, you should see the usage commands for 7-zip as shown in the top left thumbnail (click the picture to enlarge):

For IZArc:
Type “izarcc” and then press ENTER. If working correctly, you should see the usage commands for IZArc as shown in the top right thumbnail (click the pictures to enlarge and view content):

Step 4. Create/modify batch file(s)

For the sake of simplicity and to focus on quickly demonstrating the use of these two compression utilities, this guide includes two simple example batch files (one for IZArc and another for 7Zip) that compresses all files from a folder into a single zip archive with a unique date suffix, moves the zip archive to another folder, and optionally deletes the original files. For both batch files, the folder “zipdir” contains the files to zip and the folder “movedir” is where the completed archives are moved.

Depending on which utility you wish to use, click one of the following links to open the batch file text in a new window where you can cut and paste it into your text editor or download it: testizarc.bat (IZArc) and/or test7zip.bat (7-Zip). Note: if you use either batch file be sure to:
remove “_.txt” from the file name to change the extension to .bat
– create the “zipdir” and “movedir” folders
– change paths as required in the script
– copy or move some files to be archived to the “zipdir” folder

Of course, either batch file can be modified to your own needs with a text editor, including changing the name or locations for the zip folder (zipdir) and move folder (movedir)

7za command for the 7-Zip batch file (test7zip.bat):

7za a -tzip "%movedir%\%myfolder%_%TODAY%.zip" -r "%zipdir%\*.*" -mx5
  • 7za – this starts the 7-Zip command-line executable.
  • a – command to add files to the archive.
  • -tzip – (optional) switch to set the type of archive. A zip file is the default compression format.
  • %movedir%\%myfolder%_%TODAY%.zip – the name of the archive to create.[“%movedir%” is the folder where the archive is to be created. “%TODAY%” is today’s date and time variable added to the zip archive name to insure a unique archive name is created each time the batch file is executed. The parentheses are optional unless there are spaces in the file path. Finally, “.zip” is the type of archive to be created.]
  • -r – (optional) recurse sub-directories
  • %zipdir%\*.* – the files and subdirs to be archived. Everything in folder “zipdir” (this includes any subfolders when using the -r switch).
  • -mx5 – (optional) switch to set compression method. In this case, it’s zip mode, compression level 5 (level 5 is normal compression which is the default level).

When using the zip format and normal compression, the optional switches can be eliminated and the command shortened as shown below:

7za a "%movedir%\%myfolder%_%TODAY%.zip" "%zipdir%\"

IZArc command for the IZArc batch file (testizarc.bat):

izarcc -a -r -p -cx "%movedir%\%myfolder%_%TODAY%.zip" "%zipdir%\*.*"
  • izarcc – starts the izarcc compression executable.
  • -a – adds files to the archive.
  • -r – (optional) recurses into subfolders (include subfolders)
  • -p – (optional) stores relative pathnames (maintains directory structure)
  • -cx – sets the compression level to maximum.
  • %movedir%\%myfolder%_%TODAY%.zip – the name of the archive to create.[“movedir” is the folder where the archive is to be created. %TODAY% is today’s date and time variable added to the zip archive name to insure that a unique archive name is created each time the batch file is executed. The parentheses are optional unless there are spaces in the file path. Finally, “.zip” is the type of archive to be created.]
  • %zipdir%\*.* – the files to be archived. In this case, it’s all the files in the folder ” zipdir” (this includes any subfolders using the “-r” command).

Currently, the IZArc help file for the IZArc program, IZArc.chm, contains limited information for the izarcc (compress) or izarce (extract) command-line functions; however, the command-line Add-on utility does include a text manual (manual.txt) that explains the commands and includes some examples for their use.

Optional switches can be eliminated and the command shortened as shown below:

izarcc -a -cx "%movedir%\%myfolder%_%TODAY%.zip" "%zipdir%\"

Using List files

Added 03/05/2013

List files are files that contain a list of one or more files and/or directories separated by new line symbols. Both the 7-Zip and IZArc command-line utilities can use list files for processing files and directories. 7-Zip uses UTF-8 encoding for list files by default, but the encoding can be changed at the command-line using the “-scs” switch if necessary (see the command-line version section in 7-zip.chm for further information).

The command-line syntax for compressing files and/or directories with a list file:

For 7-Zip:

7za a -tzip "C:\Your Folder\yourarchivename.zip @"C:\Your Folder\yourlistfile.txt"
  • 7za – the 7-Zip command-line executable.
  • a – add files to the archive command.
  • -tzip – set archive type to a zip file (optional unless using another compression format).

Note: Using list files with older versions of 7-Zip may be slow because 7-Zip will scan entire directories and/or drives of files and folders in the list file before archiving them. The issue is documented here.

For IZArc

izarcc -a -r -p -cx "C:\Your Folder\yourarchivename.zip @"C:\Your Folder\yourlistfile.txt"
  • izarcc –starts the izarcc compression executable.
  • -a – adds files to the archive.
  • -cx – sets the compression level to maximum.
  • -r – recurse into subfolders (include subfolders)
  • -p – store relative pathnames (maintains directory structure)

Examples for a list file and a batch file to illustrate using a list file with the 7-Zip and IZArc command-line utilities are below. The batch file contains commands for both utilities using a single list file. Be sure to change the file and path names as appropriate for your situation and the batch file extension to bat before using:

zip_listfile.bat

mylistfile

Summary

It’s fairly easy to automate archiving tasks using a simple batch file using either of the two free utilities covered in this guide. For basic needs, the command-line utility for IZArc or the 7-Zip standalone console version (7za.exe) should suffice. For more complex requirements, the full version of 7-Zip (7z.exe) contains additional features for more sophisticated archiving tasks from the command-line.

For more information and examples for using the 7-Zip command-line, also see the following:

Dot Net Perl’s article, 7-Zip Command-line examples

Codejacked’s article, ZIP Up Files from the command-line

The official 7-Zip Manual, 7ZIP manual & documentation


Print Friendly, PDF & Email
Share
Private
feed
">Bear

Bad Behavior has blocked 1037 access attempts in the last 7 days.

content