19. October 2017 · Comments Off on Automate Downloading Web Images to any Folder · Categories: AutoHotKey, Graphics, Scripts · Tags: AutoHotKey, Command-line Tools, Windows
Last updated on 05/12/2020

Automate saving web images to a specified folder by copying image URLs to the clipboard using an AutoHotKey (AHK) script. Usually, the process to save a web image from a browser consists of: (1) right-click the image, (2) select “save picture as”, and (3) navigate to the folder to save the image. While usually acceptable for single images, this process can can be slow and tedious for multiple images.

folder and images

AutoHotKey and Wget need to be installed for the script to work. The version of Wget used for this guide was wget-1.19.1_curl-7.52.1_win32_win64.7z, a portable package with Curl that includes the 32-bit and 64-bit versions of Wget, a ca certificate, localization, and a manual. The latest Wget windows binaries may also be downloaded from eternallybored.org.

The script was tested on a 32-bit version of Windows XP, using portable versions of AutoHotKey and Wget. The only modification needed for a portable installation of Wget is to set the path for the wget or wget64 executables in the script. The script will work without modification if Wget and AutoHotKey are already installed and the paths for AHK and Wget were set by the installer. Paths can be checked with the “set” command from a windows prompt, or by using Control Panel -> System -> Advanced Tab -> Environment Variables -> System Variables -> Path.

AHK Script Download

(Click to view, or right-click and use “save Link Target as” to download):

  wget photos cects.txt (3.1 KiB, 2,422 hits)

Setup and Use:

Setup
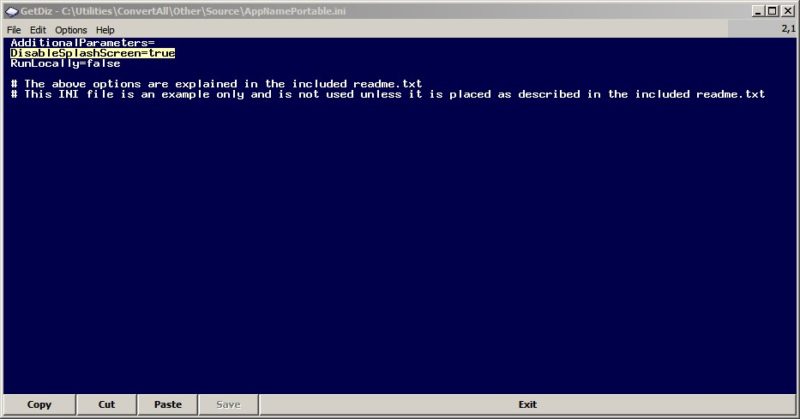
Before using, enter the path to the wget or wget64 executable in the script if wget is not in the system path. Optionally, enter a full path to an icon file for the script. Also, the extension of the script must be changed from txt to ahk.

How to Use

  1. Start the script with a double-click
  2. Enter or paste an existing folder path to save downloaded images and click OK. If no path is entered the default path will be the same folder as the script.
  3. Right click an image in your web browser and select “Copy image URL”
    1. A cmd window opens and displays downloading progress. It closes after the download is completed
    2. The image URL and date are appended to photolog.csv in the specified folder
    3. All characters after jpg. jpeg, gif, or png are removed from the URL before downloading
    4. URLs that don’t include the jpg, jpeg, gif, or png extensions are ignored
  4. To change folders, reload the script and enter a new existing folder path

Context menu tools such as FilemenuTools may be used to start the script and set the download folder automatically from any location.

Share
13. June 2014 · Comments Off on Disable the Splash Screen for Independently Installed PortableApps · Categories: TechBits · Tags: Portable Apps, Windows
Last updated on 11/17/2015

splashConvertallPortableApps.com provides free and open source portable SW that can be downloaded and run separately from the PortableApps.com Platform™ management system. When launching apps independently from the platform, the splash screen can be annoying. Although an option exists to  disable the splash screen from the PortableApps.com Platform’s™ “Advanced Preferences”, this doesn’t apply to independent apps not using this platform. Thankfully, this is easily fixed by modifying a single file.

How to disable the splash screen for your application

  • Open the application’s folder and drill down to the /Other/Source directory.
  • In the Source directory open AppNamePortable.ini with a text editor. In some cases an .ini file already exists with the application’s name in this directory. In any case, there will only be one .ini file in this directory. Open this file and go to the next step.
  • Change the line DisableSplashScreen=false to DisableSplashScreen=true (see screenshot below. Click to enlarge).
  • Use “save as” to save the file with the name of the application and the .ini extension (e.g., ConvertAllPortable.ini).
  • Close the text editor and copy or move this file to the application’s main directory.

screen shot of disable splash

That’s it. The .ini file will override the default configuration when starting the application. There should be a noticeable difference in how quickly the application starts. If you still have a splash screen, make sure that the .ini file just moved to the application’s main directory is correctly named. For example, if the application name is ConvertAllPortable.exe, the .ini file should be ConvertAllPortable.ini.


Share
21. November 2012 · Comments Off on Change folders for Save/Open and Office dialogs with Placesbar Editor · Categories: TechBits · Tags: Freeware/Open Source, Windows
Last updated on 11/13/2023

Placesbar Editor is a freeware tool that provides a convenient way to change any of the five folders on the Places Bar menu to whatever you want without directly editing the registry. PlacesBar Editor works in Windows 2000/ME/XP/Vista and Office. For Vista and above, the ability to change the Places Bar is built into the operating system, but apparently not for the Basic and Home Editions of Vista or Win7. For Vista or Win7 versions other than the Basic or Home editions, see WinVistaClub’s article: How To Add Your Own Folders To The Places Bar Or Favorite Links. In any case, for XP and older systems, this is a must-have utility. For further information, see the review on PlacesBar Editor at Freeware Genius.

places bar


Share
28. October 2012 · Comments Off on Configure a Text Editor for Visual C++ Studio Express · Categories: Development · Tags: Windows
Last updated on 04/26/2018

This guide describes how to setup a text editor to use the Visual C++ Studio Express compiler. Although many IDEs, including Visual C++ Studio, can edit code, text editors (a.k.a. programming or code editors) are often simpler, faster, are easier to use and configure, and have a shorter learning curve, especially since many users already use them and are thus familiar with the interface. In addition, many older and slower computers don’t have the resources to run IDEs such as Visual Studio very efficiently.

Many of the popular free compilers once used with text editors are now considered outdated. Today, the trend is towards using dedicated IDEs to write and compile code in an integrated environment such as Visual C++ Studio, or with other IDEs designed to be compatible with one or more independently developed compilers. Because IDEs have largely replaced the now out-of-fashion text editor as the standard coding environment, many text editors are no longer developed, supported or updated specifically for use with compilers. Because of these factors, many text editors may no longer work easily with up-to-date compilers. This guide provides one workaround solution.

The instructions for this guide were tested on a PC running Windows XP SP3, Visual C++ Studio Express 2010, and using the PSPad (ver 4.5.3) text editor. The instructions should be similar for other versions of Windows, Visual C++ Studio editions, and other text editors.

Visual Studio’s compiler is the cl.exe executable located in the “C:\Program Files\Microsoft Visual Studio 10.0\VC\bin\” directory. Without getting into all the technical details, this file only executes properly within Visual Studio’s integrated environment, so directly setting it up in PSPad’s highlighter settings won’t work. In fact, even if you try to execute cl.exe from a Windows Command window within Visual Studio, you will get an error. The solution is to compile from Visual Studio’s command window, which looks just like a regular Windows Command window, but is actually the Visual Studio environment. To accomplish this, the source code file from the text editor is passed to a batch file, which starts Visual Studio’s environment and compiles the file. Sounds somewhat complicated, but it’s simple once explained.

Below is the batch file code:

@echo off

REM This file allows text editors to compile C++ files in Visual C++.

REM Modified from the shortcut in Program Files
CALL "C:\Program Files\Microsoft Visual Studio 10.0\VC\vcvarsall.bat"

REM For 32bit Intel Processors
rem CALL "C:\Program Files\Microsoft Visual Studio 10.0\VC\bin\vcvars32.bat"

cl.exe /EHsc %1

pause

Basically, the batch file consists of only four lines: (1) @echo off, (2) CALL the Visual Studio environment, (3) pass the source file to cl.exe with parameters, and (4) pause. That’s it. Copy the code and save it with a .bat file extension. I saved my file as vsbat.bat. There are two CALL commands in the batch file to two batch files in VS (Visual Studio). The first (vcvarsall.bat) is the path taken from the shortcut for the VS Command window in the start menu and slightly modified for use in the batch file above. The other (vcvars32.bat), is the path for the VS environment batch file for 32bit processors in the “VC\bin\” directory. If you have another processor, or use another edition of VS, either batch file may have a slightly different path, name and/or contents depending on your processor. If any of the paths are different from those above, just right click on the VS Command prompt icon in the start menu and and select properties to get the path and change the above batch file accordingly. In any case, both CALL statements just start the VS environment in a Command window according to the processor type. In the above batch file, the 32bit Intel Processor command is commented out but left in for information purposes. The first one should be the only one necessary. The cl.exe command starts the compiler with the “/EHsc” option which tells the compiler not to throw a C++ exception and “%1”, which is the source file parameter passed to the batch file. Finally, pause just keeps the command window from closing.

Save the above batch file somewhere on your PC and start PSPad. Select Settings->Highlighter Settings->C/C++->Compiler Tab in PSPad’s menu. Enter the information as shown in the screenshot below (click to enlarge image):

PSPad compiler settings

For the Compiler setting, enter the path to the batch file you saved (vsbat.bat). For the Parameters setting, enter “%File%” (with parentheses), which is the source file currently loaded in the editor. The Default Directory entry is optional and self-explanatory. For the Run after Compilation setting enter “cmd.exe /K %Name%.exe” to automatically run the executable after compilation (after closing the VS Command Window). Check the Save All Files Before Compilation box and hit OK to save the settings. That’s it. PSPad is ready to compile C++ source files with Visual Studio and to run its executables.

Share
10. April 2012 · Comments Off on Unknown Exception on launch Notepad++ 5.9 Unicode or later · Categories: TechBits · Tags: Windows
Last updated on 07/10/2014

unknown exception dialogAn unknown Exception may occur when launching Notepad++ ver. 5.9 (Unicode) or later. This problem appeared on a PC running WinXP SP3 32-bit, and according to information on Sourceforge, the issue may also apply to Vista, but not Win7. The cause appears to be four plugins that may be incompatible with the updated version of Scitilla.

The four plugins are:

  • AHKExternalLexer.dll
  • ExternalLexerKVS.dll
  • NppExternalLexers.dll
  • Oberon2LexerU.dll

Update (03/21/13): Many users experiencing the unknown exception issue with Notepad++ versions since 5.9 have resolved the problem by uninstalling the PreviewHTML.dll or another plugin instead (see the comments for problem plugins).

Users can move the plugins one at a time into another folder within the “plugins” folder and relaunch the program to identify the plugin(s) responsible. In the case of the WinXP PC noted above with this problem, it was necessary to move a single plugin, the NppExternalLexers.dll file, into another folder (e.g., disabled_plugins) to get Notepad++ to launch without error. Any responsible plugin(s) causing the problem may also be deleted or renamed so they won’t load.

Share
Private
tools podcast
">Bear

Bad Behavior has blocked 1835 access attempts in the last 7 days.