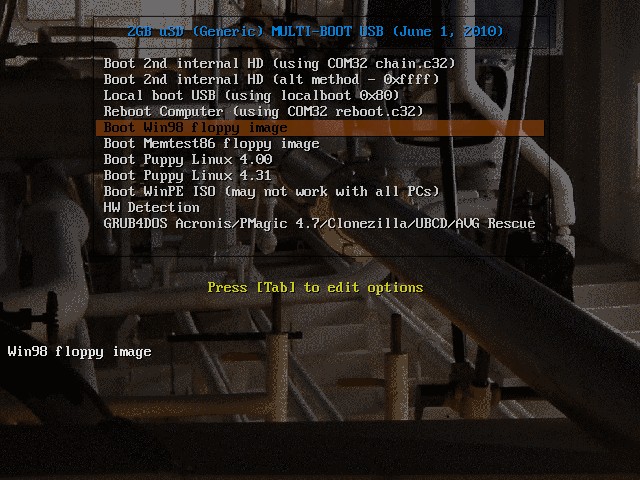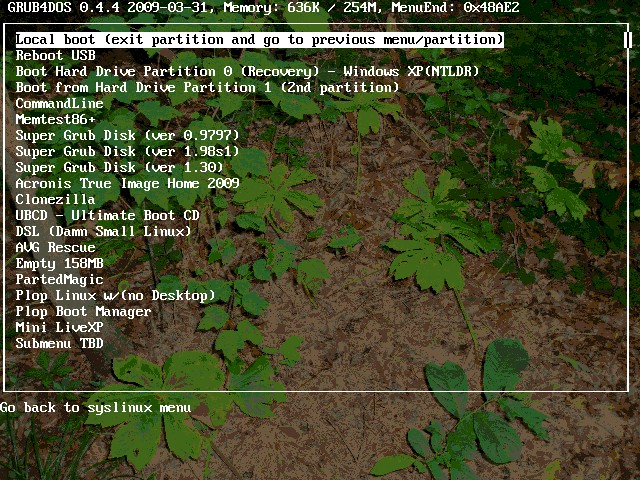
This guide does not cover splash images for GRUB2, the newest version and replacement for GRUB, which only recognizes the .tga, .jpeg, and .png image formats. GRUB is now officially known as GRUB Legacy, and while no longer developed as of version 0.9x, it is still being supported and enhanced, so GRUB will continue to remain a very usable boot-loader for the immediate future. Syslinux graphical menus are generated using the vesamenu.c32 module, which must be included in the boot medium. Syslinux Hi-color menus, like GRUB and Grub4Dos menus, also use a 640×480 size splash image, but have slightly different requirements as explained below. Also, Grub4Dos and GRUB have some splash screen requirements that are not specified in the Syslinux documentation, so apparently those particular graphical attributes are either not applicable or have no limitations in Syslinux.

The requirements for Grub4Dos or GRUB splash screen images are:
- The image must use the .xpm format (.xpm files are usually g-zipped for faster loading).
- The image must be exactly 640×480 pixels in size.
- The image can’t have more than 14 colors.
The requirements for Syslinux Hi-color splash screen images are:
- The image must be in the .png or .jpg format.
- The image must be exactly 640×480 pixels in size.
- Image depth and number of colors requirements appear to be unspecified. For this guide, the depth is set to 16 bits and the number of colors is set to 14 in the ImageMagick convert command line to obtain a smaller file size. For some images, the user may wish to increase the number of colors for better quality results.
Tools:
In Windows, the only tools required to create splash images are the ImageMagick freeware graphical image suite and a text editor to create batch files such as notepad. ImageMagick is a command-line only tool that’s fairly easy to use. As a command-line application, commands are executable from batch files or with other scripting languages. The self-installing version of ImageMagick automatically sets the registry entries, making it possible to execute it from any directory. If using the portable version, the path variable needs to be set manually or specified in a batch file to achieve this functionality. ImageMagick portable for Windows, ImageMagick-6.7.4-Q16-windows.zip, was used for this guide and tested on PCs running Vista and WinXP.
Image files to convert:
In most cases, make sure images are in the .bmp, .jpg, or .png format and are 640×480 pixels in size or have the same aspect ratio (e.g. 800×600, 1024×768, etc.) before converting them. If images are in any other format or don’t have a 640×480 aspect ratio, re-size them and change the format to .bmp, .jpg, or .png before using ImageMagick. For Grub4Dos or GRUB boot menu screens, if another original image format is used, such as .gif, ImageMagick will process it without error, but the image may be distorted or render incorrectly. Files can easily be re-sized and converted to .bmp, .jpg, or .png formats using most graphical editing programs already on your computer. Note that the .png format usually results in a slightly smaller file size than the .bmp format.
Note: ImageMagick’s resize operator is designed to produce the best possible result for the requested image size (i.e. 640×480) and ignores aspect ratio if image distortion occurs during the conversion process. Thus the re-size operator does not necessarily scale the image! That is why it’s important to use true 640×480 pixel images (or images with the same aspect ratio (e.g. 4:3) before converting them with ImageMagick. Make sure to verify image size after converting with ImageMagick. The final size of images must be exactly 640×480 to work as splash screens.
______________________________________________________________________________
Steps to Create Grub4Dos and GRUB Compatible Splash Images:
Step 1: Download and Install ImageMagick
Step 2: Convert Image Files into Grub4Dos or GRUB Compatible Images with the ImageMagick command line:
Open a command window in Windows by clicking the Start button, select RUN…, then type “cmd” and click the “OK” button. In the command window, navigate to the directory where the files are located and use the following command to convert each file to a Grub4Dos and GRUB compatible splash image:
convert -resize 640x480 -colors 14 filename.bmp filename.xpm.gz
To install a Grub4Dos or GRUB splash image in menu.lst:
- Copy the splash image to your HDD (e.g. hdo, hd1, etc.) or USB (e.g. sda1, sdb2, etc.) in the default folder or in a folder of your choice
- Edit the menu.lst file to reflect the location of the splash image:
splashimage (hd0,0)/yourfolder/filename.xpm.gz
Batch file example:
Drag and drop single or multiple .bmp, .jpg, or .png images into the batch file to automatically convert them into GRUB or Grub4Dos compatible splash screen images. Click to open the file link in your browser and then cut and paste the code into a text editor or right click to download the batch file code. Be sure to change the file extension to .bat before using:
convert_oldgrub_grub4dos_rev2.bat (drag and drop a single file or multiple files into this batch file)
convert_grub_rev3a.bat (updated script with more options)
_________________________________________________________________________
Steps to Create Syslinux Compatible Splash Images:
Step 1: Download and Install ImageMagick
Step 2: Convert Image Files into Syslinux Compatible Images using the ImageMagick command line:
Open a command window in Windows by clicking the Start button, select RUN…, then type “cmd” and click the “OK” button. In the command window, navigate to the directory where the files are located and use the following command to convert each file to a Syslinux compatible splash image:
convert -resize 640x480 -depth 16 -colors 14 yourfile.bmp yourfile.png
Note: Increasing colors from 14 to a higher value in the above command can result in higher quality images, but also slightly increases the file size.
To install a Syslinux splash image:
- Make sure the vesamenu.c32 module is installed to the boot medium (get it from the Syslinux com32\modules\ folder). Vesamenu.c32 is usually placed in the same folder or partition as the syslinux.cfg file.
- Copy the splash image to your HDD (e.g. hdo, hd1, etc.) or USB (e.g. sda1, sdb2, etc.) in the default folder or in a folder of your choice
- Edit the syslinux.cfg file to reflect the location of the splash image:
MENU BACKGROUND /yourfolder/yourfile.png
Batch file example:
Drag and drop single or multiple .bmp, .jpg, or .png images into the batch file to automatically convert them into Syslinux compatible splash screen images. Click to open the file link in your browser and then cut and paste the code into a text editor or right click the link to download the batch file code. Be sure to change the file extension to .bat before using:
convert_syslinux_rev2.bat (drag and drop single or multiple files into this batch file)
convert_syslinux_rev3a.bat (updated script with more options)
____________________________________________________________________
References:
Fedoraproject.org wiki – How to create a custom syslinux splash
Syslinux.zytor.com – Comboot/menu.c32


Spelling error report
The following text will be sent to our editors: