20. August 2018 · Comments Off on Fast Delete Complex Directories · Categories: Batch Files, Command-line Tools, Windows
Last updated on 03/02/2024

Normally, deleting directories is fairly quick if they contain a modest number of sub-directories and files. But when directories have complex structures, consisting of hundreds or thousands of sub-directories and files, it may take several minutes or even hours to delete them. The command line, with less overhead, can delete complex directories in a fraction of that time, sometimes quoted as being 20 times or more faster than the traditional explorer option. This guide demonstrates how to automate deleting large directories using batch files or directly from the command line using native Windows commands and tools, and with selected freeware GUI deletion programs that include a command line option. An additional section tests and compares the deletion speeds of the various deletion tools covered in this guide.The emphasis of this guide is on the quick deletion methods and not on secure or permanent deletion methods that are used to make files unrecoverable. Secure deletion methods are another topic and are necessarily slower since they involve overwriting files, often using several passes.

delete

Explorer can be extremely slow when deleting directories because it calculates the folder size, the number of items in the folder, and the estimated completion time before processing, and reports on the items deleted, remaining deletions, current deletions, and while monitoring and reporting on any conflicts during processing. These processes are still in effect even when the recycle bin is emptied or when files and folders are deleted directly using Shift+Del. Using the command line eliminates this overhead, resulting in a faster deletion process. Keep in mind that faster means relative to the standard deletion process, so deleting several Gigabytes of files and directories may still take a significant amount of time. For example, tests performed by a SuperUser member found that it took an average of 53 minutes to delete 28.3 GB consisting of 1,159,211 files in 146,918 folders using the fastest command line method tested (a combination of the DEL and RMDIR commands). If files and folders are to be deleted on a regular basis, probably the fastest method is to save them to a dedicated partition and then format that partition to delete everything.

Commands

Although the RMDIR command can remove a directory and its files, it’s significantly slower than using the DEL and RMDIR commands in a two-step process. The DEL command deletes the files, and the RMDIR command deletes the directory structure.

del /f/q/s "%folder%" >nul

Acts as a first pass to delete files and outputs to nul to avoid the overhead of writing to the screen

rmdir /q/s "%folder%"

2nd pass that removes the directory structure

  • /f – Force delete read-only files
  • /q – Quiet mode, do not ask to delete
  • /s – Include subdirectories

RoboCopy

Another method for deleting folder files is RoboCopy. A destination folder is mirrored from an empty source directory, which forces RoboCopy to delete any files not in the source directory.

The main command for RoboCopy to delete all files in the destination directory:

robocopy "EmptyDir" "DestinationDir" /MIR /ETA

  • /MIR – Mirror a directory
  • /W:0 – Sets wait time between retries to zero secs
  • /R:0 – Sets number of retries on failed copies to zero secs

RoboCopy works with directories and sets of files within directories as opposed to individual files. In the example batch files using RoboCopy, RMDIR is still used to remove the temporary empty directory and the parent destination directory, and DEL is used for deleting files.

Using Batch Files

Batch files, including the example files below, may be used from the command line (with parameters), from the send-to directory, the right-click context menu, or by drag and drop (the easiest method).

Command line

The batch files may be executed from a Windows command prompt with parameters, or added to the environmental path for convenience.

To execute from a command prompt, open a new cmd prompt, navigate to the batch file’s location and enter its full name, or enter the batch file’s full path. Be sure to add the directories and/or files to delete as parameters. Also include quotes around any file paths with spaces:

Ex. “C:\Program Files\delete_file_folder_fast_simple_v2.bat” “C:\Folder or file to delete”

Separate multiple parameters with a space between parameters.

Adding a batch file’s folder to the Windows environment variable allows it to be available from any cmd prompt without navigating to the batch file’s location or typing its full path. To add a batch file’s path to the Windows environment use:

start–> Control Panel–> System–> Advanced system settings–> Advanced Tab–> Environment Variables–> System Variables–> Path–> Edit.

Add the path e.g., ;C:\path to the batchfile; to the end (don’t forget the single semicolons at the beginning and end). Hit OK three times.

Right-click Context Menu

This option allows the user to right-click a folder and select the batch file from the pop-up menu. The steps to enable this are:

  1. Press the WINDOWS KEY + R to open the Run dialog box
  2. Enter regedit and press ENTER
  3. Navigate to HKEY_CLASSES_ROOT\Directory\shell\
  4. Right-click on the yellow shell key. Select New > Key
  5. Enter a name: Delete &Fast then press ENTER
  6. Right-click on the Delete &Fast folder created, and select New > Key
  7. Enter “command” and press ENTER.
  8. Left-click on the yellow command key created. Double-click the (Default) entry.
  9. In the Value Data field, enter the batch file to use, e.g., cmd /c \”C:\\Path to\\delete_file_folder_fast_simple_v2.bat\” %1″ then press OK

Another way to accomplish the above is to use a reg file. Copy the code below, paste it into a file editor and save it as “Delete Fast.reg”. Double click the file to merge its contents to the registry and the right-click menu is ready to use.


Windows Registry Editor Version 5.00

[HKEY_CLASSES_ROOT\Directory\shell\Delete &Fast\command]
@="cmd /c \"C:\\Path to\\delete_file_folder_fast_simple_v2.bat\" %1"

Send to Directory

Another option is the Send to directory, Just create a shortcut and add it to the appropriate directory:

For newer versions of Windows, the send to directory is located at:

C:\Users\<yourusername>\AppData\Roaming\Microsoft\Windows\SendTo

For XP, the location is:

C:\Documents and Settings\<yourusername>\SendTo

To use, right click a file or directory and select the batch file from the Send to menu.

Drag and Drop

The easiest way to use the example batch files is to just drag and drop folders or files onto them. No files or folders will be deleted without user confirmation.

Differences in the Example Batch Files

delete_files_folders_fast_v2.bat – lists multiple files and folders to be deleted, the parent directory, limited folder/file attributes, and limited information on the names and numbers of files and folders deleted. Also includes a delayed exit, allowing the files and folders deletion information to be reviewed before the window closes (default 10 seconds).

delete_file_folder_fast_simple_v2.bat – limited to deleting one file or one folder at a time. Doesn’t provide much interaction or feedback except to ask  the user if they actually want to delete the displayed file or folder. Automatically exits after deleting the file or folder.

delete_files_folders_fast_robocopy_v3.bat – essentially the same as delete_file_folder_fast_simple_v2.bat except that RoboCopy’s output is displayed during execution and after processing files. The batch file is paused after execution allowing the user to view the results without automatically exiting. Updated 01-29-20.

delete_files_folders_fast_robocopy_silent_v3.bat – essentially the same as above except that RoboCopy’s output is NOT displayed for faster execution and processing. The batch file automatically exits after a delay of 10 seconds. Added 01-29-20.

delete_file_folder_fast_simple_robocopy_v2.bat – limited to deleting one file or one folder at a time.Uses RoboCopy instead of DEL for deleting folder contents. RoboCopy output is redirected to nul to eliminate command output. Automatically exits after deleting the file or folder.

delete_file_folder_fast_byenow_v1.bat – uses command line program byenow to delete a folder and all of its files and subdirectories.Uses byenow’s default settings. Batch file pauses on completion.

delete_file_folder_fast_byenow_ntapi_v1.bat – uses command line program byenow to delete a folder and all of its files and subdirectories. Same as previous batch file but uses –delete-ntapi option. Batch file pauses on completion.

The batch files may be renamed and will work identically.

Example Batch Files using DEL, RMDIR, and RoboCopy

Left-click to view the file in the current window, or use right-click and “Save Link As” to download.The batch files are changed from the previous versions as the /S switch greatly slowed performance when deleting individual files. The /S switch is still used, but only for folders.
Note: Remove the “.txt” extension before using.

The batch files below use only the RMDIR and DEL commands.

  delete_files_folders_fast_v2.bat (4.0 KiB, 3,108 hits)

  delete_file_folder_fast_simple_v2.bat (1.2 KiB, 1,935 hits)

The below batch files use RoboCopy to delete folder files, RMDIR to delete  empty folders, and DEL to delete individual files. If RoboCopy is installed but not included in the Windows environment path, be sure to change the path for RoboCopy for your system in the batch file (don’t forget to remove the REM to enable it). No changes to the batch files are required if RoboCopy is already installed and included in the path. To check, type “robocopy: in a command prompt. If RoboCopy executes, it’s already installed and included in the environment path.

  delete_files_folders_fast_robocopy_v3.bat (4.6 KiB, 2,173 hits)

  delete_files_folders_fast_robocopy_silent_v3.bat (5.1 KiB, 1,917 hits)

  delete_file_folder_fast_simple_robocopy_v2.bat (1.7 KiB, 2,274 hits)

Freeware Deletion Tools

A number of GUI and command line file and folder deletion tools are available, but most focus on secure deletions and don’t provide an option for standard deletions. The freeware utilities below are able to perform both standard and secure deletions from the GUI and from the command line.

These GUI-based tools work from the command line either through the main executable for by using separate command line executables. The advantage of using these tools rather than using native windows commands like RMDIR and DEL is that it’s easier to configure complex deletion options such as deleting files or folders based on modification or creation date, size, or type, as well as to write logs, send the process to background, set automatic system shutdowns, exclude/include specific files and folders, stop on errors, and set many other options using  a single command line.

FastCopy

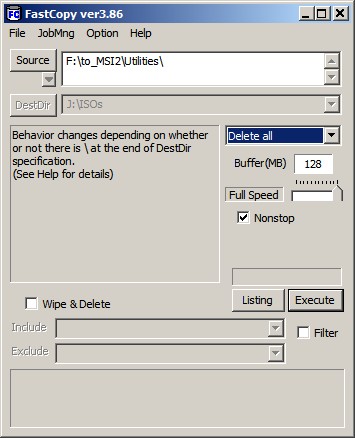
FastCopy is a copy/backup utility that can also perform standard and limited secure deletions on individual files and folders. It can be installed as a regular program or as a portable application by selecting extract during installation. The program executable also accepts commands from the command line.

Files and folders can be dropped and dragged onto the interface to set the source or destination directories. From the Options menu, the program can be configured to install shell extensions to enable FastCopy to delete, copy, or move files/folders by using the right click menu in Windows Explorer.
FastCopy Main Interface

FastCopy Interface

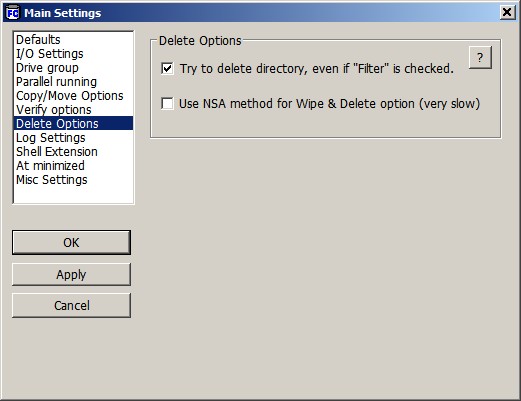
FastCopy Delete Options
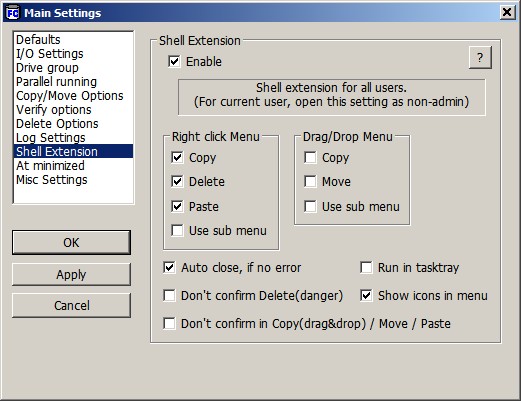
FastCopy Delete Options

FastCopy Shell Extension Options

FastCopy Shell Extension Options

FastCopy Command line and Batch File

A listing of FastCopy’s command line options can be found online help page and in the application’s help file. The below batch file is configured to delete files and folders using drag and drop with two options: (1) Do NOT ask for confirmation before deleting and disable logging, and (2) Ask for confirmation before deleting and enable logging. The batch file pauses after execution. The batch file is configured to use a portable installation.

The breakdown of the first FastCopy command line (no confirmation, no logging):

FastCopy.exe /cmd=delete /no_confirm_del /log=FALSE /auto_close %*

  • /cmd=delete – delete command
  • /no_confirm_del – Don’t confirm before deleting
  • /log=FALSE – Disable write operation/errors information to the logfile
  • /auto_close – Close automatically after execution is finished with no errors
  • %* – All dragged and dropped files and folders

Example Batch File for FastCopy (remove .txt extension before using):

  Fastcopy_delete_file_folders_v1.bat (1.7 KiB, 1,485 hits)

Fast Folder Eraser Pro

Fast Folder Eraser Pro is an installed freeware program. It can perform both standard and secure deletions both from the command line or from the GUI interface. The standalone command line executables are located in the command-line folder which contains two CLI executables, a 32-bit version and a 64-bit version.

This is a utility specifically designed to delete directories and the sub-folders and files within them. Unlike FastCopy, it’s unable to delete individual files by filename, but it’s able to delete individual or groups of files based on size, dates, and other filters, and it can exclude files using wildcards. Although folders and files can be directly dragged and dropped onto the GUI interface for deletion, testing revealed that when a file was dropped on the GUI, the program also deleted every other file and folder within the same directory as the dropped file. There were no issues with folders dropped onto the GUI or deleted using the CLI executable. The CLI executable is unable to delete individual files and generates an error if an individual file path is used with the delete command.

Compared to FastCopy, the number of command line options is limited. For example, no option exists to enable or disable confirmation before deleting a file, so a confirmation option must be programmed into the batch script using Windows commands to obtain this functionality.
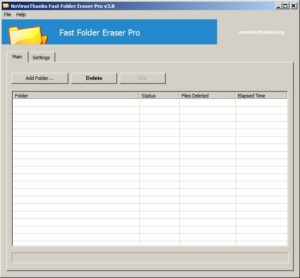
 

Fast Folder Eraser Pro Interface
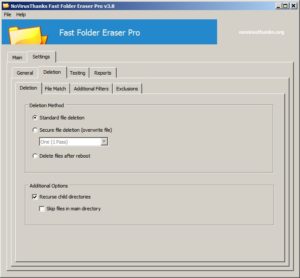
Fast Folder Eraser Pro Interface

Fast Folder Eraser Pro Delete Options

Fast Folder Eraser Pro Delete Options

Fast Folder Eraser Pro Command line and Batch File

The help file for the standalone CLI executables is located in the command-line folder along with two executables, a 32-bit CLI executable, FFECmd32.exe, and a 64-bit executable, FFECmd64.exe. The batch file below is configured for drag and drop using the 32-bit executable, includes confirmation before deletion, and pauses after execution.. Unlike FastCopy where multiple files and folders can be processed using a single command, the CLI executable in Fast Folder Eraser Pro is able to process only a singe folder at a time. If multiple folders are dragged and dropped onto the batch file, folders after the first are ignored. If a file or multiple files are dropped onto the batch file, the files are not processed.

The breakdown of the Fast Folder Eraser Pro command line as used in the batch file:

FFECmd32.exe /path %* /r /logfail

  • /path %* – absolute path of directory to initiate deletion
  • /r – recurse child directories
  • /logfail – log unsuccessful file deletions to a log file

Example Batch File for Fast Folder Eraser Pro (remove .txt extension before using):

  FastFolderEraserPro_delete_file_folders.bat (903 bytes, 1,386 hits)

byenow Command Line Utility

byenow is a specialized command line tool specifically designed to delete files and directories under a single folder. It uses several strategies not found for other deletion tools to streamline and optimize the deletion process such as: (1) providing essential, but not verbose, processing information, (2) the option to suppress confirmation, (3) using all available CPU cores by default, and (4) the option to use the NtDeleteFile API instead of the standard deletion process (DeleteFile API) to delete files. The NtDeleteFile API is faster because it requires only a single syscall instead of the three syscalls needed by the standard DeleteFile API. byenow also displays the time required for the deletion process upon completion. Below is a summary listing of byenow’s user settable options:

  • preview the number files and folders to be deleted
  • set the number of threads (uses same number of threads as CPU cores by default)
  • suppress confirmation
  • list errors
  • display progress on a single line
  • staged deletion – scan folder 1st and then delete
  • use NtDeleteFile API instead of the default DeleteFile API
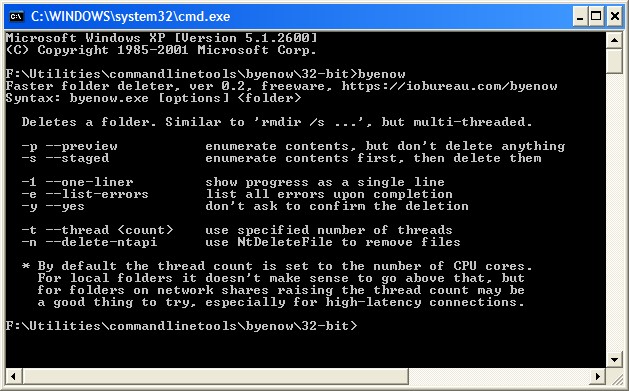
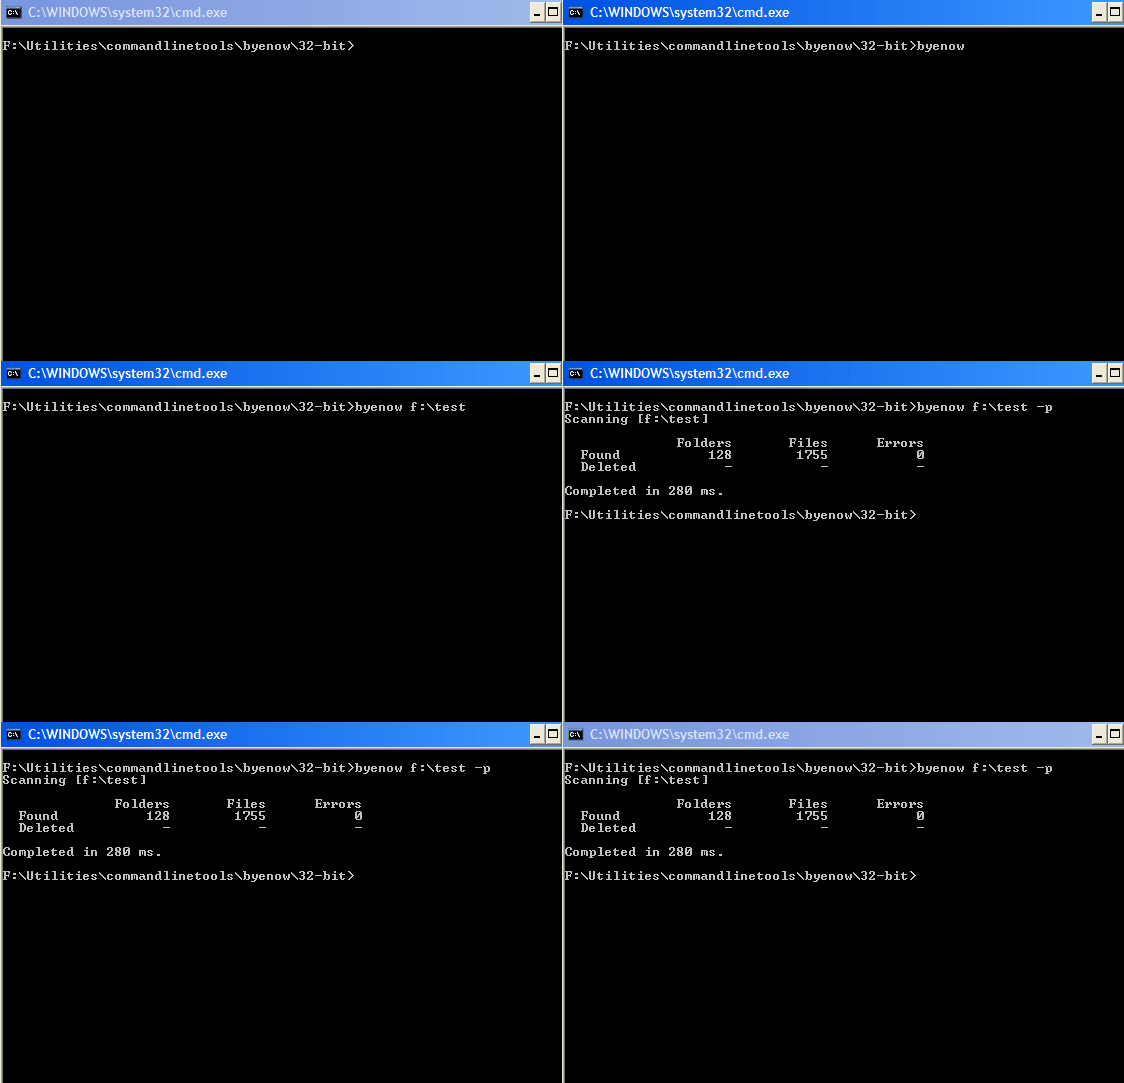
byenow options

byenow Options

byenow preview mode

byenow Preview

byenow Command line and Batch File

Because byenow is already optimized for file deletion using its default settings, and its options are settable from the command line, only a basic batch file is needed to launch the program in a command window. Two batch files are provided, one with default settings and the other using the NtDeleteFile API. Because byenow is a command line only program, be sure to set the path for byenow in the batch files.

The breakdown of the byenow command line (with NtDeleteFile API option):

byenow “%~1” –delete-ntapi

  • –delete-ntapi – use NtDeleteFile API instead of DeleteFile API

Example Batch Files for byenow (remove .txt extension before using):

  delete_files_folders_fast_byenow_v1.bat (1.6 KiB, 1,512 hits)

  delete_files_folders_fast_byenow_ntapi_v1.bat (1.6 KiB, 1,325 hits)

Batch File Benchmarks

The batch files were compared by benchmarking them using the standard Windows deletion process as a baseline. Nine identical test directories were created, each comprised of 12255 files in 1599 directories, and totaling 1658MBs. Each batch file was timed using a timer and/or using the logged times where appropriate to measure how long it took them to delete the test directory.

Batch fileResults (min:secs)
delete_file_folder_fast_simple_robocopy_v2.bat0:26
delete_files_folders_fast_byenow_v1.bat0:27
delete_files_folders_fast_robocopy_silent_v3.bat0:31
delete_file_folder_fast_simple_v2.bat0:32
delete_files_folders_fast_byenow_ntapi_v1.bat0:33
delete_files_folders_fast_v2.bat0:34
Fastcopy_delete_file_folders_v1.bat (confirm)0:37
Fastcopy_delete_file_folders_v1.bat (no confirm)0:40
FastFolderEraserPro_delete_file_folders.bat0:44
delete_files_folders_fast_robocopy_v3.bat0:49
Windows Standard Deletion to Recycle Bin*1:57

*Time includes 0:40 secs to send the test directory to the Recycle Bin and 1 min and 17 secs to empty the Recycle Bin (0:40 + 1:17 = 1:57).

Conclusions

Most of the command line tools tested were faster than using Windows standard delete, especially when the time needed to empty the Recycle Bin was included. The fastest command line tools were nearly twice as fast as the Windows standard delete process that sends files to the Recycle Bin, and over 4 times faster than Windows when the time needed to empty the Recycle Bin was factored in. Suppressing output and disabling logging helped to improve the performance of the command line tools, but the most significant factor appears to be that all the command line tools directly delete files and don’t use the Recycle Bin. The tests suggest that any program that directly deletes files will automatically seem faster in comparison to the full Windows standard delete process, even when they are actually slower than the time Windows takes just to send deleted files to the Recycle Bin. So while command line tools are  faster than using Windows Explorer for deleting large directories and files, It appears that claims of increased deletion speeds by multiple factors are likely exaggerated, and a more realistic expectation is probably from 2-3 times faster – at least for the freeware tools tested.

The test machine used was a 1.86GHz 32-bit single core laptop with 2GB of RAM. Some of the programs, such as byenow, are designed to take advantage of multiple cores, so results could vary greatly depending on the hardware and OS used. Also, the test directories were not really representative of a “real world” situation as they were actually small, and most users are unlikely to use specialized deletion tools to occasionally delete directories of less than 3-4 GBs. Although useful as a “rough estimate”, a more realistic test scenario might be to test the various batch file commands on machines with upgraded OS and hardware, and using a larger and more complex directory structure of perhaps 50 GBs or more .

Summary of test limitations:
Test on multiple hardware and OS platforms
Use larger and more complex test directories
Test multiple times to compensate for machine state variation

Related Information and References:

Fastest Way to Delete Large Folders in WindowsMatt’s Repository

How to delete huge number of files on WindowsSuperuser

Print Friendly, PDF & Email
Share
12. September 2014 · Comments Off on Multi-boot UFD with Hi-Res Menus using Windows and Syslinux 6.xx · Categories: Batch Files, Graphics, Multiboot USB · Tags: Boot Loaders
Last updated on 11/13/2023

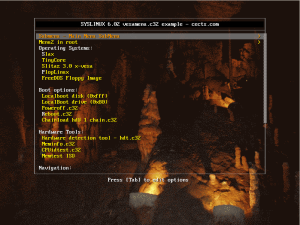
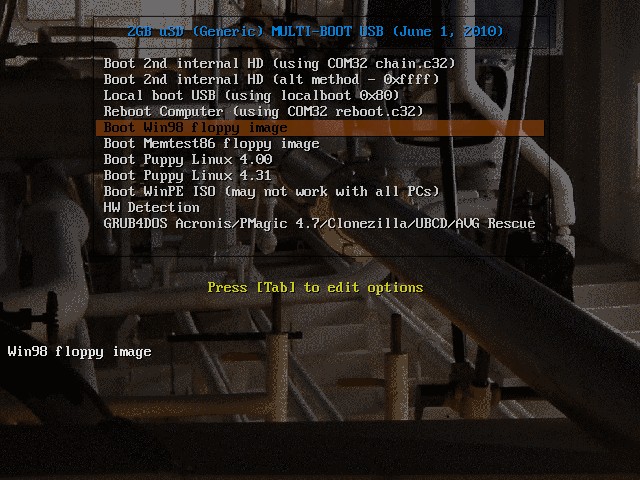
screenshot of main menuThis guide provides everything needed to create a customizable multi-boot USB flash drive in Windows with high resolution menus and customized splash screens. It provides a framework for creating a basic but functional multi-boot flash drive using Syslinux 6.xx as the primary bootloader. Basic menu configuration files and splash screen examples are provided. Experienced users shouldn’t find it difficult to follow this guide to create a ready-to-use bootable flash drive that can be customized to their needs. Users should already have some familiarity with Syslinux, installing Linux distros, and with formatting and partitioning flash drives.

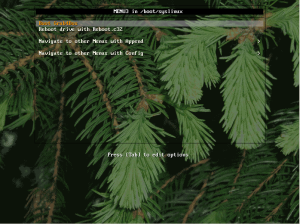
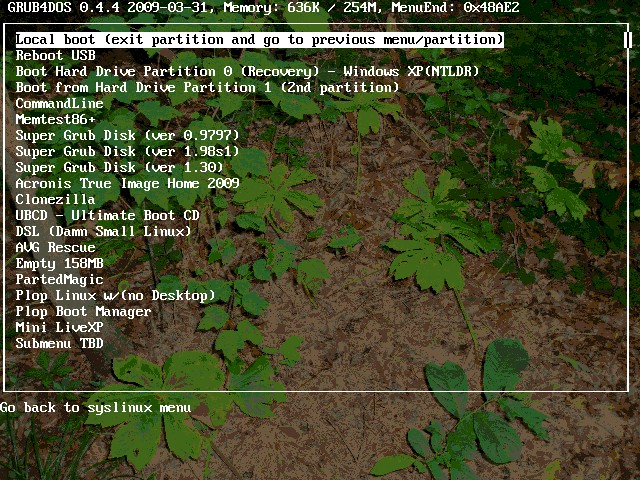
For the sake of simplicity, this guide is limited to setting up Syslinux for a single partition using the BIOS modules. The instructions were tested and verified on a system running Windows XP SP3 and using Syslinux 6.02.screenshot of menu3 This guide is essentially a more up-to-date version and combination of two previous posts, Create a Multiboot Multipartition USB with Syslinux and Grub4Dos and Create Custom Grub4Dos, GRUB and Syslinux Compatible Splash Images.

Syslinux 6.xx

Syslinux provides two menu systems, the Simple Menu System and the Advanced Menu System. The advanced system must be compiled while the simple system includes the ready-to-use vesamenu.c32 and menu.c32 modules. This guide uses the vesamenu.c32 module.

Splash Screen Resolutions

Syslinux 6.xx can use splash screens in the .png or jpg formats at resolutions from 640×480 up to whatever is supported by the system. If the flash drive is going to be used on multiple systems, it would be best to use a typical resolution such as 800×600 that would work across most systems.

Modules

Since version 5.xx, modules are no longer stand alone or need additional libraries to work. A description of the changes can be found on the Syslinux Wiki at https://www.syslinux.org/wiki/index.php/Library_modules. In most cases, Syslinux will alert you of any additional libraries required when you try to use them.

(U)EFI (Unified/Extensible Firmware Interface)

Although there has been a lot of hype about (U)EFI (Unified/Extensible Firmware Interface) in general and support for (U)EFI began with Syslinux 6.xx, the (U)EFI modules are still fairly new, have a number of unresolved issues, and are not widely used at this time. UEFI in Syslinux is buggy and has problems on both Windows and Linux. Arch Linux describes some of the more relevant ones at https://wiki.archlinux.org/index.php/syslinux#Limitations_of_UEFI_Syslinux. Some of the issues with UEFI are:

  • UEFI Syslinux does not support chainloading other EFI applications like UEFI Shell or Windows Boot Manager.
  • UEFI Syslinux does not boot in Virtual Machines like QEMU/OVMF or VirtualBox or VMware and in some UEFI emulation environments like DUET.
  • Memdisk is not available for UEFI.
  • UEFI Syslinux application syslinux.efi cannot be signed by sbsign (from sbsigntool) for UEFI Secure Boot.
  • Using TAB to edit kernel parameters in UEFI Syslinux menu leads to garbaged display (text on top of one-another).

Other Syslinux issues/limitations:

  • Using Syslinux 6.02 on BTRFS volumes corrupts the superblock.
  • Syslinux cannot access files from partitions other than its own.
  • Using the memdisk module to boot most ISOs is often difficult or impossible.

Syslinux.org has admitted to these limitations and has often recommended other bootloaders such as GRUB, Grub4Dos, or Plop Boot Manager to compliment Syslinux. In spite of this, Syslinux remains one of the most functional and popular bootloaders not only for flash drives, but for other bootable devices like CDs, for most operating systems, and for chainloading partitions and hard drives. It’s very flexible and is an excellent choice as the primary bootloader for most situations. And by adding another bootloader such as Grub4Dos, this greatly enhances the flash drive’s booting options.

Creating a Multi-boot Flash Drive steps:

  1. Format the flash drive
  2. Install Syslinux 6.xx
  3. Install modules and files
  4. Install or create splash screens
  5. Customize menu configuration files (optional)

1. Format the Flash Drive

Format the flash drive with FAT16 or FAT32.

2.  Install Syslinux 6.xx

Download and unzip the latest .zip version of Syslinux 6.xx from Kernel.org. The file size should be about 12mB before unzipping. Open a cmd window and cd to C:\syslinux-6.xx\bios\win32. Type the following to install Syslinux to the flash drive where x is your flash drive:

syslinux.exe -sfma x:

This installs ldlinux.c32 and ldlinux.sys to the flash drive.

3. Install Modules and Files

Modules

Look for and copy the BIOS versions of the modules shown in the directory tree for the root of the flash drive. An easy way to locate the modules is to use something like AgentRansack. Modules have a .c32 extension (except memdisk) and are located in various folders in the C:\syslinux-6.xx\bios\com32 directory or C:\syslinux-6.xx\bios directory (for memdisk). Place all of the modules in the root directory of your flash drive. Copy the following modules:

chain.c32
cmd.c32
cpuidtest.c32
hdt.c32
ldlinux.c32
libcom32.c32
libgpl.c32
libmenu.c32
libutil.c32
meminfo.c32
menu.c32
memdisk
poweroff.c32
pwd.c32
reboot.c32
vesainfo.c32
vesamenu.c32

Configuration Files

The help text, menu.cfg, syslinux.cfg and other configuration files required can be downloaded from the configfiles download link below. Right click and using “save target link as” or similar (depending on your browser) to download it and then unzip and extract its files to the root of the flash drive.

  configfiles (9.8 KiB, 1,178 hits)

Download the latest version of Grub4Dos from grub4dos-chenall. Extract the grub.exe and menu.lst files to the root of the flash drive.

4. Install or Create Splash Screens

Install ready-made Splash Screens

To get started, splash screens tested to work with the configuration files are provided below. Just unzip them to the splashimages folder. After installing the splash screen images, the flash drive is ready to test or use.

Link for the splash screens: splashscreens

Nine (9) splashscreen files are provided. Download them as an album and extract to the splashimages folder. Slightly change the filenames by removing the number and dash so the filenames match those used in the menu configuration files.

The correct splashscreen filenames are:

  1. cave_800x600_14.png
  2. fallleaf_800x600_14.png
  3. grassyhill_800x600_14.jpg
  4. mist_800x600_14.png
  5. nightlight_800x600_24.jpg
  6. ny_800x600_14.jpg
  7. road_800x600_14.png
  8. Spruce_800x600_14.png
  9. winter_800x600_14.jpg.

The link below displays a directory of what the flash drive contents should look like at this point:

indexFlashDrive

Create and Install Customized Splash Screens (optional)

To create your own menu graphics, use the batch file below or another graphics program to create .png or .jpg format splash screens from your image files. Since the menus are already configured with light text, you may want to use a dark color to start off with. Generally, 14 colors works nearly every time and renders more quickly.

The batch file below is configured to use ImageMagick portable installed to the Utilities folder. If ImageMagick is already installed, simply change the line set IMdir=C:\Utilities\ImageMagick\ to your ImageMagick location. Use double quotes if the path contains spaces (e.g., set “IMdir=C:\Program Files\ImageMagick\”). Be sure to use the latest version of ImageMagick since the newest version has improved image conversion options and processing.

convert_syslinux_rev4b.bat

If creating a customized splash screen, place it in the splashimages folder in the flash drive and change the file name in the appropriate menu configuration file(s) as below so it can be used on the next boot:

MENU BACKGROUND /splashimages/your image name.jpg

5. Customize Menu Configuration Files (optional)

After the flash drive is working properly, try to install bootable applications or Linux distros by modifying the boot options in the menu configuration files for Syslinux or in menu.lst for Grub4Dos. Some menu label entries are already provided in the Syslinux menus that were verified to work such as Slax, Grub4Dos, and a few others.

That’s it. If anything gets messed up, everything can just be reinstalled and started again from the beginning. Good luck.


References:

Syslinux – https://www.syslinux.org/wiki/index.php/SYSLINUX

Syslinux Menu – https://www.syslinux.org/wiki/index.php/Menu

Syslinux 6 Changelog – https://www.syslinux.org/wiki/index.php/Syslinux_6_Changelog

Memdisk – https://www.syslinux.org/wiki/index.php/MEMDISK#ISO_images


Print Friendly, PDF & Email
Share
22. February 2013 · Comments Off on Copying Directory Structures without Files · Categories: Batch Files, Command-line Tools, Windows · Tags: File Tools, Freeware/Open Source
Last updated on 09/25/2022

Recreating directory structures can be a tedious and error-prone chore, especially if using the right-click method to create multiple structures and folders. This guide describes three methods to easily copy directory structures (without files) in Windows: (1) with the command line, (2) with GUI tools dedicated for that purpose, and (3) by configuring a freeware file manager, FreeCommander, to enable this function.

https://clker.com

Copying Directory Structures from the Command-line

For those comfortable with the command-line, two commands that can be used for this purpose are the Xcopy and Robocopy, both of which have tons of options. Although others, such as the FOR command could also be used, Xcopy and Robocopy are by far the most popular tools used for this purpose.

Xcopy

Xcopy is included in systems up to Windows 8. XCOPY stands for extended copy. It’s a more powerful version of copy with additional features that can copy files, directories, and whole drives. Note that although Xcopy is included with most versions of Windows, it has been deprecated in favor of RoboCopy.

To use Xcopy to clone a directory without files, use the following syntax:

xcopy /t /e "C:\Your Folder" "C:\New Folder"

/t = Copies the subdirectory structure, but not the files

/e = Copies subdirectories, including any empty ones

When using Xcopy with the above switches, you may be asked to specify whether the target is a directory or a file before the Xcopy command executes, but if the command is executed from a batch file, no user interaction is required.

Note: Xcopy doesn’t display any progress or completed operations information when executed. If the target directory doesn’t exist, it will be created.

Additional Xcopy commands can be found here.

Robocopy

Robocopy stands for “Robust file copy.” It’s a standard feature for Windows starting with Vista. It’s can also be installed in WinXP as part of the Windows Resource Kit.

To use Robocopy to clone a directory without files, use the following syntax:

robocopy "C:\Your Folder" "C:\New Folder" /e /xf *

same as above but without displaying the status:

robocopy "C:\Your Folder" "C:\New Folder" /e /xf * >nul

same as first example and creates a log (overwrites existing log):

robocopy "C:\Your Folder" "C:\New Folder" /e /xf * /log:yourlogfile.log

same as first example and appends to log (appends to existing log):

robocopy "C:\Your Folder" "C:\New Folder" /e /xf * /log+:yourlogfile.log

Copy only the top level sub-folders (sub-folders in the source directory)

robocopy "C:\Your Folder" "C:\New Folder" /e /LEV:2 /xf *

/e = Copies subdirectories, including empty ones.

/LEV: n = Copy only the n LEVels of the source. For n=2, only the top level sub-folders will be copied

/xf = Excludes files matching the specified names or paths. Wildcards “*” and “?” are accepted

Additional Robocopy commands can be found here.

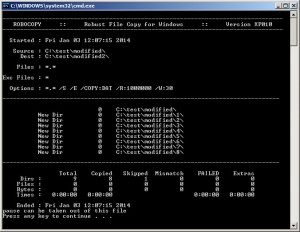
Note: Robocopy displays progress and completed operations information when executed as shown in the below screenshot. If the target directory doesn’t exist, it will be created.


Download example xcopy and robocopy batch files:

  xcopybatch.bat (582 bytes, 3,433 hits)

  robocopybatch.bat (653 bytes, 2,785 hits)

Note: Remove the .txt extension before using either batch file.


Freeware GUI Tools for copying Directory Structures

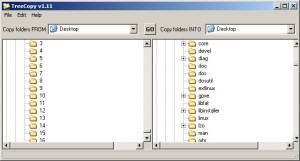
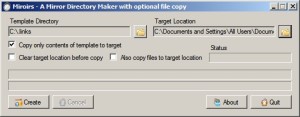
Two easy-to-use GUI (graphical user interface) apps dedicated specifically to creating directory structures without files are TreeCopy and Miroirs:

TreeCopy – Portable and freeware. Runs on Win95 to Win8.

treecopy screenshot

Miroirs – Freeware. Requires installation. Runs on XP/Vista/Win7

Miroirs screenshot

xcopy Frontend – Freeware. Portable. Runs on Windows XP or later. Provides an overview of all available parameters and makes it easy to select the needed parameters. Each parameter can be activated by clicking on it. The finished command line can be copied or executed directly.


FreeCommander setup to copy Directory Structures

FreeCommander is a freeware file manager that can be configured to copy directory structures using a customized batch file with the Xcopy and/or Robocopy commands. FreeCommander Ver. 2009.02b was used for this example. These instructions are modified from those provided on the FreeCommander forums.

FreeCommander Instructions

Create a batch file with the following code and save it with any name desired such as “copyFolderStructure_freecommander.bat.” For Xcopy the batch file’s main code consists of:

xcopy %1 %2 /t /e

%1 and %2 are the first and second parameters passed to the batch file (structure to copy and target)
The /t and /e options are the same as above

For Robocopy the batch file’s main code consists of:

robocopy %1 %2 /e /xf *

%1 and %2 are the first and second parameters passed to the batch file (structure to copy and target)
the /e and /xf * options are the same as above


Download example xcopy and robocopy batch files for FreeCommander:

  freecommander_xpcopy.bat (763 bytes, 923 hits)

  freecommander_robocopy.bat (773 bytes, 777 hits)


Note: a pause may be entered at the end of either of the batch files below to keep the command window open for viewing the output. Remove the _.txt extension before using.


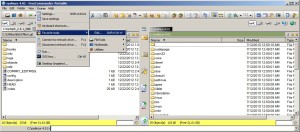
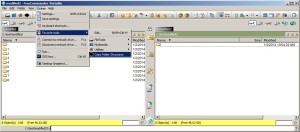
From the menu, select Extras->Favorite Tools->Edit or use (SHIFT+CONTROL+Y). Click the image below to enlarge.

freecommander menu

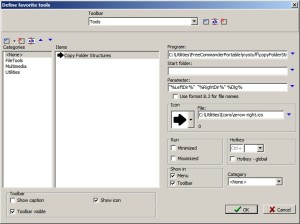
Select none from the left-hand column named Categories, then click once in the Items column.

FreeCommander Tools Configuration

Use the Items:Add to list button that appears above the Items column to create an item, for instance Copy Folder Structure.

Select Seek program by clicking the blue arrow next to the program field to navigate to and select the saved batch file’s (e.g. C:\tools\copyFolderStructure_freecommander_robocopy.bat) full path into the program field.

Enter the following into the parameter field:

"%LeftDir%" "%RightDir%" %Dlg%

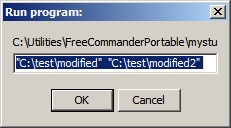
The variables, %LeftDir% and %RightDir%, pass the address of the left and right folders to batch file parameters %1 and %2. The %Dlg% variable is optional and may be omitted if desired. It is used to display a Run program window (screenshot below) before actually starting the script to allow the folder names to be verified. It also provides a way for the operation to be cancelled.

dialog

If desired, add an icon by using the blue button next to the icon field to navigate to the icon’s location.

Make sure the boxes are checked as in the Define Favorite Tools screenshot above before hitting OK.

Tool Selection
The toolbar now contains an entry for copying Folder Structures. The tool can be selected from the menu with Extras->Favorite Tools->Name of your tool or by using the favorites icon (make sure Extras is enabled in Extras->Settings->View->Toolbar if it’s not visible on the toolbar).

Using FreeCommander

To use, select the structure to copy in FreeCommander’s left pane and select the target directory in the right pane. Select and click your tool from the toolbar or menu as described above. After the Run program dialog appears, click OK to continue.

FreeCommander Select

Xcopy doesn’t provide an option to display progress or completed operations. However, with Robocopy, the output will display the copy operation details as shown below (a pause was used in this batch file):

RoboCopy Output

Robocopy Output

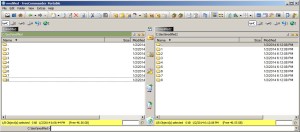
If no errors occur, the folder structure will be copied as in the following screenshot:

FreeCommander copied

Print Friendly, PDF & Email
Share
06. January 2012 · Comments Off on Using the WinRAR Command-line tools in Windows · Categories: Batch Files, Windows · Tags: Archiving Tasks, batch files
Last updated on 08/06/2018

This guide describes the use of the WinRAR command-line tools (v5.01) for compressing and uncompressing files in a directory and their use in batch files (for IZArc and 7-zip, see this post). This guide is an extension of a previous post, Automate Zipping Tasks using the Command-line Interface that explained the use of the command-line tools for two free compression utilities, IZArc and 7-Zip. The information in this guide was tested on a Windows PC running Vista.

compression represented by a vise

WinRAR is a popular and powerful archive manager that can be used from the command-line or with scripting languages such as batch files. It includes two command-line tools, rar.exe and unrar.exe, where rar.exe compresses and unrar.exe uncompresses files. Both are located in the “C:\Program Files\WinRAR” folder in the installable version. Although WinRAR is shareware, it can be used on a trial basis for 40 days. Using WinRAR’s command-line tools is similar to those for IZArc and 7-Zip. The syntax for using the WinRAR executables is:

RAR or UNRAR <command> -<switch1> -<switchN> <archive> <files...> <@listfiles...> <path_to_extract\>

To get a listing of the options for the rar and unrar commands, open a command window, cd to the WinRAR directory, and type rar or unrar and then press enter (rar /?  or rar help may also be used, use rar >rar_cmds.txt or unrar >unrar_cmds.txt to print the command options to a file). For more detailed information, open the rar.txt file in the WinRAR directory which contains the RAR console version user’s manual.

Examples to compress a folder:

rar a -r yourfiles.rar *.txt

creates archive yourfiles.rar and compresses all .txt files in the current folder

rar a -r C:\yourfolder\yourfiles.rar *.txt

creates archive yourfiles.rar in C:\yourfolder and compresses all .txt files in the current folder and its subfolders

rar a -r C:\yourfolder\yourfiles.rar C:\otherfolder\*.txt

creates archive yourfiles.rar in C:\yourfolder and compresses all .txt files in otherfolder and its subfolders

rar a yourfiles 

creates archive yourfiles.rar and compresses all files in the current folder, but doesn’t include subfolders (note lack of extension; WinRAR will use the default extension .rar)

“a” command. Adds to the archive

“-r”  switch. Recurses subfolders

Examples to uncompress a folder: 

unrar x c:\yourfile.rar *.gif c:\extractfolder\

extracts all *.gif files from yourfile.rar to c:\extractfolder\ (trailing backslash required) and restores the folder structure

unrar e c:\yourfile.rar 

extracts all files in c:\yourfile.rar to the current folder (folder structure ignored)

“x” command. Extracts with full paths

“e” command. Extracts and ignores paths

Compression example using Multiple Switches:

rar a -r -ep -u -df -x*.bat e_archive.rar c:\test\*.*

compresses all new or updated files from c:\test and its subfolders to e_archive.rar, deletes the files after they are added to the archive, and excludes any files with a “bat” extension,

“a” command adds to the archive

“-r”  switch. Recurses subfolders

“-ep” switch. Adds files to the archive without including the path information. Multiple can exist in the archive with the same name.

“-u” switch. Equivalent to the “u” command when combined with the “a” command. Adds new files and updates older versions of the files already in the archive

“-df” switch. Deletes files after they are moved to the archive

“-x” switch. Excludes the specified file(s) from the operation

Basic rules for WinRAR:

  • When files or listfiles are not specified, all files in the current folder are processed
  • When specifying all files in a folder, yourfolder or yourfolder\*.* are equivalent
  • Folder structures are automatically saved in archives (but not automatically extracted)
  • WinRAR uses the .rar extension by default, but that can be overridden by specifying the zip extension in the archive name
  • Switches and commands are not case sensitive and can be written in either upper or lower case

Another point is that WinRAR doesn’t appear to install to the Windows path environment variable, so it must be specified either at a command prompt, set permanently in the environment variable settings, or specified in a batch file (WinRAR v3.71.0.0 was used for this guide and that may not be the case for all versions).

To set the Windows path environment variable temporarily at a command prompt or in a batch file, use the following command:

set path="C:\Program Files\WinRAR\";%path%

To set it permanently in the Windows path for your PC:

start–>Control Panel–>System–>Advanced system settings–>Advanced Tab–>Environment Variables–>System Variables–>Path–>Edit. Add the path ;C:\Program Files\WinRAR; to the end (don’t forget the single semicolons at the beginning and end). Hit OK three times.

Using WinRAR in Batch Files:

Two batch file examples are provided below, The uncompress_rar.bat file decompresses all .rar files from a folder and places the extracted files into another directory.

The compress_rar_rev2.bat file provides the following compression options for a user specified directory. Option 4 is the most commonly used structure and the most appropriate option in most cases:

  1. Compress files in dir individually (no subdirs)
  2. Compress files in dir and subdirs individually – no paths
  3. Compress all files in dir into a single archive (no subdirs)
  4. Compress all files in dir and subdirs into a single archive
  5. Compress all files in dir and subdirs into a single archive – no paths

Be sure to change the extension(s) to .bat before using either file and edit the folder paths as required. Both of the following batch files temporarily set the Windows path environment variable for the WinRAR application folder when executed.

Batch file downloads:

Print Friendly, PDF & Email
Share
09. December 2010 · Comments Off on Create Custom Grub4Dos, GRUB and Syslinux Compatible Splash Images · Categories: Batch Files, Graphics · Tags: batch files, Boot Loaders, Linux
Last updated on 12/07/2017

Syslinux Boot Menu ScreenThis guide demonstrates how to quickly and easily create custom 640×480 splash images for Grub4Dos, GRUB, and Syslinux menus using the Windows version of ImageMagick. The information in this guide was tested with Grub4Dos ver 0.4.4, GRUB ver 0.97, and Syslinux ver 4.04. Both of these Grub4Dos and GRUB versions have nearly the same requirements for splash images so that the same images can be used by either one. The formats are xpm for GRUB/Grub4Dos and png/jpg for Syslinux.

This guide does not cover splash images for GRUB2, the newest version and replacement for GRUB, which only recognizes the .tga, .jpeg, and .png image formats. GRUB is now officially known as GRUB Legacy, and while no longer developed as of version 0.9x, it is still being supported and enhanced, so GRUB will continue to remain a very usable boot-loader for the immediate future. Syslinux graphical menus are generated using the vesamenu.c32 module, which must be included in the boot medium. Syslinux Hi-color menus, like GRUB and Grub4Dos menus, also use a 640×480 size splash image, but have slightly different requirements as explained below. Also, Grub4Dos and GRUB have some splash screen requirements that are not specified in the Syslinux documentation, so apparently those particular graphical attributes are either not applicable or have no limitations in Syslinux.

grub4dos menu screenThis is a quick and dirty method that was tested to work as specified for this guide. The aim of this guide is to quickly generate custom splash images from existing images rather than to create works of art. As such, the quality of the finished images largely depends on the initial quality and size of the original image files.

The requirements for Grub4Dos or GRUB splash screen images are:

  • The image must use the .xpm format (.xpm files are usually g-zipped for faster loading).
  • The image must be exactly 640×480 pixels in size.
  • The image can’t have more than 14 colors.

The requirements for Syslinux Hi-color splash screen images are:

  • The image must be in the .png or .jpg format.
  • The image must be exactly 640×480 pixels in size.
  • Image depth and number of colors requirements appear to be unspecified. For this guide, the depth is set to 16 bits and the number of colors is set to 14 in the ImageMagick convert command line to obtain a smaller file size. For some images, the user may wish to increase the number of colors for better quality results.

Tools:
In Windows, the only tools required to create splash images are the ImageMagick freeware graphical image suite and a text editor to create batch files such as notepad. ImageMagick is a command-line only tool that’s fairly easy to use. As a command-line application, commands are executable from batch files or with other scripting languages. The self-installing version of ImageMagick automatically sets the registry entries, making it possible to execute it from any directory. If using the portable version, the path variable needs to be set manually or specified in a batch file to achieve this functionality. ImageMagick portable for Windows, ImageMagick-6.7.4-Q16-windows.zip, was used for this guide and tested on PCs running Vista and WinXP.

Image files to convert:
In most cases, make sure images are in the .bmp, .jpg, or .png format and are 640×480 pixels in size or have the same aspect ratio (e.g. 800×600, 1024×768, etc.) before converting them. If images are in any other format or don’t have a 640×480 aspect ratio, re-size them and change the format to .bmp, .jpg, or .png before using ImageMagick. For Grub4Dos or GRUB boot menu screens, if another original image format is used, such as .gif, ImageMagick will process it without error, but the image may be distorted or render incorrectly. Files can easily be re-sized and converted to .bmp, .jpg, or .png formats using most graphical editing programs already on your computer. Note that the .png format usually results in a slightly smaller file size than the .bmp format.

Note: ImageMagick’s
resize operator is designed to produce the best possible result for the requested image size (i.e. 640×480) and ignores aspect ratio if image distortion occurs during the conversion process. Thus the re-size operator does not necessarily scale the image! That is why it’s important to use true 640×480 pixel images (or images with the same aspect ratio (e.g. 4:3) before converting them with ImageMagick. Make sure to verify image size after converting with ImageMagick. The final size of images must be exactly 640×480 to work as splash screens.
______________________________________________________________________________

Steps to Create Grub4Dos and GRUB Compatible Splash Images:

Step 1: Download and Install ImageMagick

Step 2: Convert Image Files into Grub4Dos or GRUB Compatible Images with the ImageMagick command line:

Open a command window in Windows by clicking the Start button, select RUN…, then type “cmd” and click the “OK” button. In the command window, navigate to the directory where the files are located and use the following command to convert each file to a Grub4Dos and GRUB compatible splash image:

convert -resize 640x480 -colors 14 filename.bmp filename.xpm.gz

To install a Grub4Dos or GRUB splash image in menu.lst:

  • Copy the splash image to your HDD (e.g. hdo, hd1, etc.) or USB (e.g. sda1, sdb2, etc.) in the default folder or in a folder of your choice
  • Edit the menu.lst file to reflect the location of the splash image:

    splashimage (hd0,0)/yourfolder/filename.xpm.gz

Batch file example:

Drag and drop single or multiple .bmp, .jpg, or .png images into the batch file to automatically convert them into GRUB or Grub4Dos compatible splash screen images. Click to open the file link in your browser and then cut and paste the code into a text editor or right click to download the batch file code. Be sure to change the file extension to .bat before using:

convert_oldgrub_grub4dos_rev2.bat (drag and drop a single file or multiple files into this batch file)

convert_grub_rev3a.bat (updated script with more options)
_________________________________________________________________________

Steps to Create Syslinux Compatible Splash Images:

Step 1: Download and Install ImageMagick

Step 2: Convert Image Files into Syslinux Compatible Images using the ImageMagick command line:

Open a command window in Windows by clicking the Start button, select RUN…, then type “cmd” and click the “OK” button. In the command window, navigate to the directory where the files are located and use the following command to convert each file to a Syslinux compatible splash image:

convert -resize 640x480 -depth 16 -colors 14 yourfile.bmp yourfile.png

Note: Increasing colors from 14 to a higher value in the above command can result in higher quality images, but also slightly increases the file size.

To install a Syslinux splash image:

  • Make sure the vesamenu.c32 module is installed to the boot medium (get it from the Syslinux com32\modules\ folder). Vesamenu.c32 is usually placed in the same folder or partition as the syslinux.cfg file.
  • Copy the splash image to your HDD (e.g. hdo, hd1, etc.) or USB (e.g. sda1, sdb2, etc.) in the default folder or in a folder of your choice
  • Edit the syslinux.cfg file to reflect the location of the splash image:

    MENU BACKGROUND /yourfolder/yourfile.png

Batch file example:

Drag and drop single or multiple .bmp, .jpg, or .png images into the batch file to automatically convert them into Syslinux compatible splash screen images. Click to open the file link in your browser and then cut and paste the code into a text editor or right click the link to download the batch file code. Be sure to change the file extension to .bat before using:

convert_syslinux_rev2.bat (drag and drop single or multiple files into this batch file)

convert_syslinux_rev3a.bat (updated script with more options)
____________________________________________________________________

References:

Fedoraproject.org wiki – How to create a custom syslinux splash

ImageMagick – Resizing Images

Syslinux.zytor.com – Comboot/menu.c32


Print Friendly, PDF & Email
Share
home
profile
">Bear

Bad Behavior has blocked 1850 access attempts in the last 7 days.