19. December 2009 · Comments Off on Recovering from an Accidental Partial Format of an External USB Drive · Categories: Linux, Windows · Tags: Data Recovery, Windows
Last updated on 11/13/2023

If you ever accidentally formatted an external drive on a PC with several plugged-in USB devices, you probably remember seeing them listed in the formatting tool’s selection box. The (C:) and (D:) drives may be listed, which are usually the boot drive and the backup drive. If an (E:) is displayed, it’s probably the optical drive. However, distinguishing between the other drives or devices may not be as apparent, especially when information beyond the drive letter assignment isn’t shown. This is particularly true for drives or other USB  devices that don’t have identifying information on them. Under these conditions, it’s easy to become careless or impatient and select the wrong drive; especially if its letter assignment appears to be correct. If you are unlucky, you may notice a flashing light on the device confirming that the wrong drive is being formatted.

mystica_USB_Flash_Drive (public domain clip art www.clker.com)

I did this recently when in a hurry and chose the wrong drive letter. Instead of formatting the flash drive, the external 250GB backup drive was formatting. Panicking, I immediately realized the error and stopped the formatting process – but it was too late. Checking the hard drive, I found it couldn’t be accessed. The drive letter was still visible in Windows, but no files or folders were displayed and nothing could be written to or read from the drive.

Fearful of losing the data, I tried several file recovery tools with no success until using TestDisk. TestDisk is a free (open source) data recovery tool available from CGSecurity. With TestDisk, I was able to successfully restore the drive’s partition and it worked normally.

Luckily, all of the data was still intact. That’s because during a high-level format (quick format), only the external drive’s partition table information or boot sector are erased. According to Windows Help Central, even a full format can be recovered pretty easily as long as the original files are not overwritten with new data. That’s because the spaces containing file information on the disk drive are not really wiped clean, but instead, the areas where files are stored are marked as available for new data. As long as no new data is written to the drive, chances are excellent that the data is 100% recoverable using simple freeware data recovery tools. That’s because if you hosed the partition table or MBR (Master Boot Record) during the format process, the drive isn’t likely to be writable anyway.

TestDisk is a utility that can be used to restore corrupted and missing MBRs, partition tables, and data. TestDisk works on most operating systems including Windows, Linux, BSD, SunOS, and Mac OSX and it’s included with many Linux LiveCD distros such as PartedMagic and many others. It’s a very useful and sophisticated tool in the hands of experienced users. Unfortunately, because data recovery can be a complex issue, inexperienced users may find it “user unfriendly”. However, documentation for the program is thorough and one can find many examples, technical notes, and step by step instructions in the documentation section on TestDisk’s Wiki. Also, the TestDisk Step by Step guide contains plenty of screen-shots which greatly helps in the data recovery process.

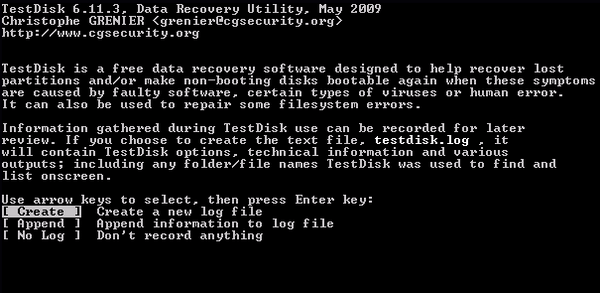
The following screen-shots show what to expect after starting TestDisk for recovering a deleted partition (note: the screens below show the results for a working hard drive that doesn’t have any problems).


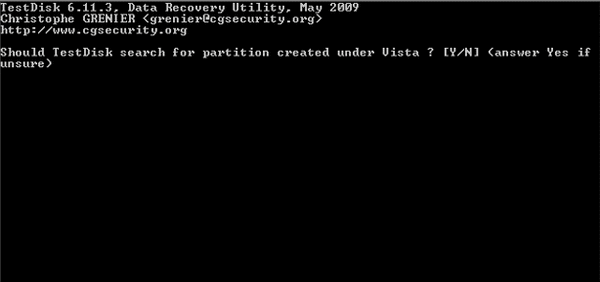
Above is the first screen. For most cases,  select the default option – Create a new log file.


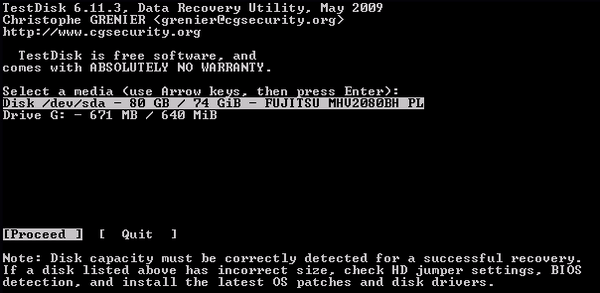
Next, select your media device with the problem. In the screen above, the main hard drive is selected.


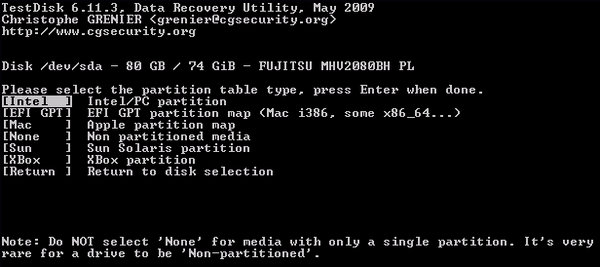
Select Intel if using a Windows or Linux machine.


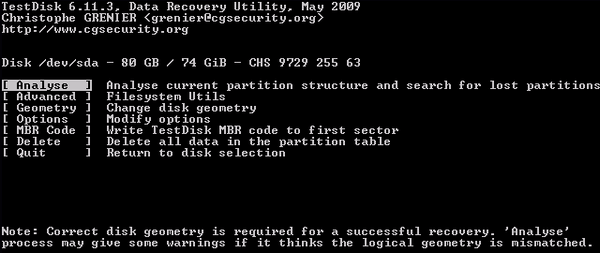
In most cases “analyse” should be selected.

FYI, “Advanced” provides options to restore the boot sector or to create images for partitions.

analyse
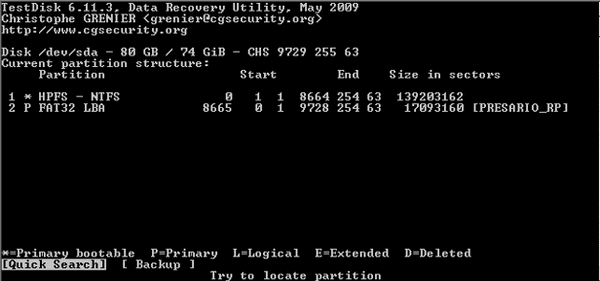
Analyses displays a preliminary list of the current partitions for the drive selected. Next, select Quick Search to continue searching for additional partitions.

quicksearch
“Yes” should be selected for most situations.

selectpartition
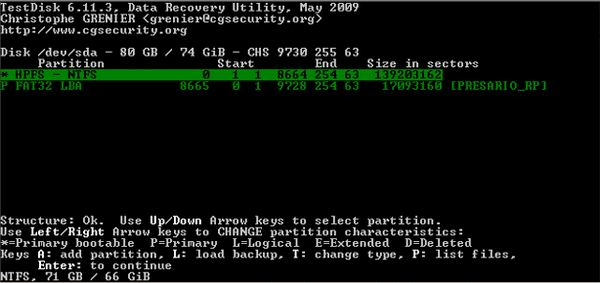
TestDisk displays the structure analysis results and displays the partitions. Healthy partitions will be highlighted in green. Here, you can use the up/down arrow keys to select a partition to further analyze or recover, then hit ENTER. 

Pressing “P” will list the files in the partition, which can provide some assurance that the data is still intact. Do not use the left/right keys – they are used to change the partition’s characteristics!

deepersearch

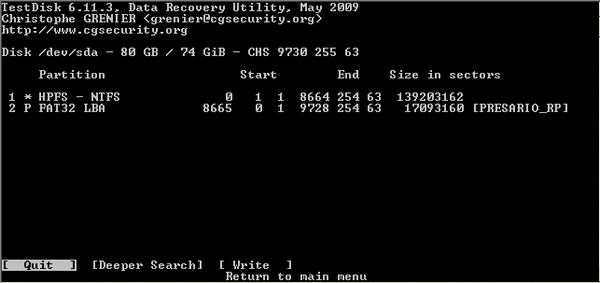
If the partition you want to restore is listed, select “Write” and then Enter to restore it and that should be it. If TestDisk didn’t find your partition, you have the option to perform a deeper search by selecting “Deeper Search”. In the screenshot above, the results show that no problems were found (the screenshots are for a working hard drive).

For more information, the TestDisk Wiki’s Step by Step instructions explain the recovery procedure well enough so that even novices shouldn’t have a problem.

—————————————————————————————————————————————————————————

Other TestDisk how-tos:

The How-to-Geek explains recovering partitions with TestDisk using an Ubuntu LiveCD (ver 9.10):

Recover Data Like a Forensics Expert Using an Ubuntu Live CD

A MakeTechEasier how-to for data and partition recovery using TestDisk:

How to Recover Data and Partitions for Free with TestDisk

Other Data Recovery Utilities

If the drive is still accessible or if only a few files are missing, you may want to try one of the easier-to-use file recovery programs listed below before trying TestDisk. Some that I’ve successfully used in the past to recover lost data are:

Recuva

Restoration

PhotoRec

Install or Recover MBR or Boot Sector

If you know the problem is a damaged or missing MBR (Master Boot Record), a number of tools can be used to repair or restore it – including TestDisk.

MBR Recovery:

Write a new MBR with TestDisk:
  1. Start TestDisk
  2. Create a new logfile
  3. Select a media
  4. Select partition table type (Intel, Mac, Sun, etc)
  5. MBR code (this writes a new MBR)

Below are are other tools and resources that can be used to install, repair or restore the MBR. Note that some of the tools listed require that a backup of the MBR was previously saved:

Bootice (restores a saved MBR only)

How to fix MBR in Windows XP and Vista

5 Free Tools to Backup and Restore Master Boot Record (MBR)

MBR, Partition Table and Boot Record Tools

Boot Sector Recovery:

A Sourceforge article describes the procedure for recovering a Boot sector using TestDisk to successfully fix a dual-boot PC (WinXP & Ubuntu) that wouldn’t boot. The procedure is as follows:

Boot Problems:Boot Sector (follow the steps in the either case section for TestDisk as shown below)

  • 1st screen: select No Log and then press ENTER
  • 2nd screen: select the drive to restore and select Proceed
  • 3rd screen: select Intel
  • 4th screen: select Advanced
  • 5th screen: select the partition and select Boot
  • 6th screen: select Rebuild BS
  • 7th screen: type “Y” to confirm

If using the Grub bootloader for a dual-boot system, make sure to update Grub (it may be necessary to use a LiveCD of your Linux distribution to do this).

Summary

If the easier-to-use tools above don’t work for whatever reason, give TestDisk a try to recover the partition, MBR or boot sector, but follow the directions carefully. Although fairly simple, it’s still possible to mess things up so thoroughly that the only way to recover the data would be to send the drive to a very expensive professional data recovery service.

Remember, if you accidentally format or erase files from your external USB drive, don’t panic. Get to work on recovering your data because chances are that it can be accomplished more easily than you think.
 

Share
18. December 2009 · Comments Off on Booting DSL (Damn Small Linux) from a Multi-boot USB Drive · Categories: Multiboot USB · Tags: Linux
Last updated on 05/13/2019

Damn Small Linux Screen ShotIf you are having trouble getting DSL (Damn Small Linux) to boot on a multi-boot USB with SYSLINUX, then this guide may help. After experiencing the same problem and seeing other online complaints about it, I decided to create this guide.

This tutorial describes how to get DSL (Damn Small Linux) to boot from the boot partition of a working bootable USB flash drive currently using SYSLINUX as the boot loader.

Although many related guides on the web describe how to create multi-boot USB drives, many are lacking when it comes to DSL because: (1) a different boot loader such as GRUB is used (2) the instructions are for creating dedicated boot USBs using a single app or Linux distro, or (3) not enough details specific to DSL are provided.

Rather than create a comprehensive how-to for multi-boot flash drives, this guide limits itself to this particular distro, since other guides, including Create a Mulitboot Multipartion USB with Syslinux and Grub4Dos, provide instructions for successfully creating multi-boot USBs using other Linux distros and applications.

This tutorial applies if the following conditions are met:

1.  You can successfully boot at least one other distro or application on the USB drive with SYSLINUX (Ver 3.81 was used for this guide)

2.  You want to add DSL to create a multi-boot USB drive or you are unable to boot DSL on a USB drive with at least one other distro or application that currently boots with SYSLINUX

OK. Now for the instructions:

Download the Embedded Distribution of DSL:

Why use the embedded version?  It’s provided in a zip file, so there is no need to extract and manipulate files from an ISO. The embedded version also comes with QEMU, which allows DSL to run within Windows and in Linux. So even if you can’t boot DSL from SYSLINUX, you can check the integrity of the DSL installation using QEMU by clicking dsl-base.bat in the DSL folder (see next step). The downside of running DSL with QEMU is that it will be extremely slow, about 5-6 times slower, than when it’s running natively. The DSL embedded version used for this guide was version 4.4.10. You can get the embedded version of DSL from here. The direct download link for the embedded version of DSL used for this guide is dsl-4.4.10-embedded.zip.

Create a Folder for DSL Embedded in the Root of the USB Drive’s Boot Partition and Unzip DSL Embedded to that Folder:

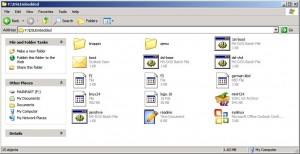
Pick any name you like. In my case, I made a folder named “DSLEmbedded” on my USB’s root. The reason for a separate folder is to avoid conflicting files that may already exist on the root for other distros or applications such as syslinux.cfg, knoppix folders, boot.msg, readme.txt and others. In fact, it’s preferable to put every distro in its own folder when you can, but that’s not always possible without complex folder organization schemes and/or file coding mods.  Because of this, some distros should be in the root by themselves or installed to their own partition since they often use complex boot menus, they’re coded to work from root, and/or they have multiple files and folders (making upgrading and troubleshooting more complex when everything is installed to a single partition). However, DSL in a separate folder can coexist with many other distros using SYSLINUX as the boot-loader – you just need to edit the root’s syslinux.cfg file and experiment to see what can coexist with the least amount of work and conflict. Currently, I have DSL co-existing in the same partition with SuperGrubDisk, two versions of Puppy Linux, and several Windows apps in ISO format, all booting from the same syslinux menu and almost all of them in separate folders.

DSL Folder Screen ShotNote: When you unzip DSL embedded, it will place all its files in a folder named “dsl-4.4.10-embedded” by default. Take everything out of this default folder and put it in your folder (see screen-shot of my folder to the left). The reason for this is to refer to a basic folder name in the syslinux.cfg file, preferably one that without dashes, periods, or spaces.

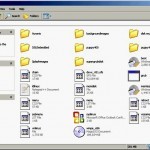
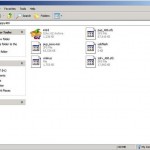
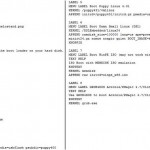
Below are some thumbnail screen-shots showing the organization of the main partition, the Puppy400 folder, and the syslinux.cfg file.  As with all of the screen-shots in this guide, click to enlarge them.  Although outside of the scope of this guide, you can see Grub4Dos (grub.exe and menu.lst) are used to boot ISOs and other apps in multiple partitions which also have SYSLINUX installed in the boot sector.

partition screenshot

Partition

puppy400 screenshot

Puppy400

syslinux screenshot

Syslinux.cfg

For a more detailed view of the syslinux.cfg file, either click the link in this sentence to open in your browser or right click the link to save it.

Edit the Current syslinux.cfg in the Root drive to Create a Menu Entry for DSL and Save It:

This guide assumes a syslinux.cfg file already exits in the root and is used to boot at least one other distro or application.

Important: Pay particular attention to use of “/”, spaces, and capitalization in file paths!  Below is a copy of my entry:

LABEL 6
MENU LABEL Boot Damn Small Linux (DSL)
KERNEL /DSLEmbedded/linux24
APPEND ramdisk_size=100000 lang=us apm=power-off vga=normal initrd=/DSLEmbedded/minirt24.gz nomce noapic quiet BOOT_IMAGE=knoppix knoppix_dir=/DSLEmbedded/KNOPPIX

Note: (1) Unless you used the same name, use the name of your folder in place of “DSLEmbedded” everywhere in the menu label above. (2) Depending on your needs and/or your system, you may want to change the DSL cheat codes in the APPEND line. See the DSL Cheat Codes Wiki for more information.

That’s all there is to it. Reboot your PC or laptop and you should now be able to boot DSL from the SYSLINUX boot menu!

_________________________________________________________________________________

If Nothing is Working:

If DSL still doesn’t boot, on another bootable USB drive (with SYSLINUX as the boot-loader), try installing Embedded DSL by itself to the root and not in a separate folder (move everything out of the folder and place it in root). In other words, and this is important – what was in the default folder (e.g., dsl-4.4.10-embedded or DSLEmbedded) should now be in the root of the partition. DSL should now boot with the default syslinux.cfg file. If that works, you are getting close; it’s just a matter of getting the file paths correct for the DSL folder you are going to use. Next, place DSL in a folder and move the syslinux.cfg file to root and then edit it using the instructions above to get it to boot. If successful, you can then duplicate those changes to the syslinux.cfg on the other USB drive. Also, you could just use the 2nd USB drive and add other apps and distros to it. Add one app or distro at a time then test to see if both boot, then add another distro and test again.

Because there are unlimited combination’s of distros and apps possible, differences in hardware, many multi-booting techniques and other factors, there is no way around some experimentation/trial and error testing to determine what works and what doesn’t.

If you are having trouble making a working multi-boot USB with SYSLINUX or just want to learn how, below are links to get started. If you still can’t get DSL to boot after that, then come back and recheck the suggestions again. Usually, most problems are minor such as using incorrect file paths or file names in the syslinux.cfg file.

Good luck and have fun.

Additional help is available at the following:

Guide for Multi-booting from a USB Drive

Damn Small Linux Wiki: Install to USB from Windows (Method II)

Comments welcome.

Share
Private
">Bear

Bad Behavior has blocked 1554 access attempts in the last 7 days.

feedback